
Do you know How to shape a straw hat brim? A straw hat is a classic and versatile accessory that can elevate any outfit, whether for a beach day or a summer garden party. However, one key element that sets a straw hat apart from other caps is its brim. The shape of the bill can significantly impact the overall look and functionality of the hat. A well-shaped beak can protect from the sun while allowing for a stylish and flattering appearance.

This article will guide you through the step-by-step process of shaping a straw hat brim to achieve the perfect look. Whether you have a brand-new straw hat or an old one needing a refresh, these techniques will help you create a customized brim to suit your style. With the right tools and techniques, you can easily shape your straw hat brim and take your summer wardrobe to the next level. So, grab your hat, and let’s get started on shaping the perfect bill.
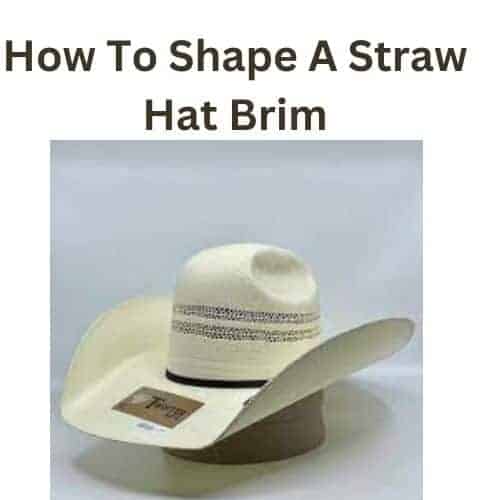
Straw Hat Brim
Shaping the brim of a straw hat is a delicate process that requires a balance between moisture, gentle handling, and proper drying.
Characteristics of a Straw Hat Brim
Material: Straw hats are made from various materials like raffia, tequila palm (used for Panama hats), sea grass, or synthetic straw. Each type has a different level of flexibility and durability.
Flexibility: The flexibility of the brim varies based on the type of straw and the weaving method. Some straw hats have a stiffer bill, while others are more pliable.
Shape: The brim of a straw hat can come in various shapes and widths, from wide-brimmed sun hats to narrower-brimmed fedoras. Depending on the style, the form can be flat, slightly curved, or more pronounced.
Tips for Shaping a Straw Hat Brim
Moistening the Brim: Gently mist the brim with water. This softens the straw fibers, making them more malleable. Avoid soaking the hat, as too much water can weaken or damage the straw.
Hand Shaping: Use your hands to mold the brim gently into the desired shape. For a curved bill, you might roll the edges slightly, or for a flat brim, press it down on a flat surface.
Using Steam: If the projection is exceptionally stiff, steam can soften it. Hold the hat over a pot of boiling water or use a garment steamer, allowing the moisture to penetrate the straw. Be cautious not to over-steam, as it might weaken the straw.
Drying: Let the hat dry naturally in a well-ventilated area after shaping. These can cause the straw to warp or become brittle.
Additional Support: For a more permanent shape, you can use a clear hat stiffener spray designed explicitly for straw hats.
Professional Shaping
If you’re hesitant to shape the hat yourself or it’s a precious piece, consider taking it to a professional milliner or hat specialist. They have the expertise and equipment to shape and care for straw hats without damaging them.
How to Shape a Straw Hat Brim: A Step-by-Step Guide to Creating Your Perfect Look
Straw hats can be timeless fashions that enhance your look and give essential protection from the sun. If you plan to attend an outdoor party, take an afternoon at the beach, or want to add some look to your outfit, learning how to make a brim of straw is crucial. This detailed guide will take you through the steps to shape the straw brim on a straw hat, ensuring you’re left with a hat that matches your style and makes a statement, among others.
Why Shape Your Straw Hat Brim?
The brim of a straw hat is more than looks; it is also an issue of practicality.
Modification: Tailor the hat to fit your design
Functions: Adjust for different requirements for sun protection
Reconstruction: Revitalize an old or hapless cap
The Rising Popularity of Straw Hats
Recent research has revealed that straw caps are gaining in popularity. According to a report by Research and Markets.com, the global hat market is projected to grow significantly by 2027, driven by a growing veneration for sun protection apparel. Straw hats, in particular, have been gaining popularity due to their lightweight and breathability.
Preparing to Shape Your Straw Hat Brim
Before beginning the process of shaping, collect all the materials needed:
1. Straw hat
2. Steam source
3. The spray bottle is full of water
4. Books that are heavy or weighs
5. Tissue or cloth
6. The band is a hat
Choose the Right Straw Hat
Be sure that your hat is made of high-quality straw, like Panama straw or Toyo straw. These straws are more flexible and easy to form. If you’re not sure about the product you’re considering, a brief chat with the company or studies on the manufacturer will help you make an educated choice.
Step-by-Step Instructions for Shaping Your Straw Hat Brim
Step 1: Assess the Current Shape
Examine the cap’s form. Place it on a flat surface and observe the bends and angles within the brim. This can help you determine the areas needing reshaping or adjustments.
Step 2: Make up Your Work Area
Place your workstation in a space where you can quickly heat the hat. Protect the area using a towel or a cloth so you don’t damage the hat.
Step 3: Steam the Straw Hat Brim
With a boiling pot of water or a handheld steamer ducks steam, you can redirect it to the brims of the hat. If you use Ensure together, ensure it sits 6-8 inches over the water so you don’t soak the brim. The taming process softens the straw, which makes it more easily shaped.
Benefits of Steaming
Steaming makes straw more flexible, kills bacteria, and refreshes the cap. It’s also a green choice compared to chemical treatment.
Step 4: Shape the Brim
After the straw is soft, shape the brim in your desired design. Below are some designs you can think of:
Straight Brim: Ideal for a Modern, sleek, and polished appearance.
Curved Up Brim: The classic cowboy fashion that is now returning to fashion.
Floppy Brim is Ideal for those who want to relax and style a beachy feel.
The brim should be bent gently in sections and held in position for several seconds to set the shape. If you require a stronger, sharper edge, try using weights or books to keep the brim in position as it dries.
Step 5: Allow the Hat to Dry
Set your hat on the towel-covered surface and leave it fully dry. The drying process can last a couple of hours and overnight, based on the quantity of steam used. If your brim needs further modifications, go through the shaping and steaming process when it’s dry.
Step 6: Final Adjustments and Accessories
When the hat is dry and has retained its new form, you can make any tweaks. A hat band may help provide extra fashion and keep the fresh design intact.
Long-Term Care Tips
To warrant that your new hat retains its appeal and quality:
Storage Properly: Keep the hat in a dry and cool area.
Beware of excessive moisture: Water and straw are not a good combination, so don’t wear a cap in the rain.
Clean gently: Use a soft brush or cloth to clean the dust and other debris.
How Often Should You Reshape Your Hat?
Based on wear and tear, you may require a reshaping of your hat each month. A regular, gentle cleaning can increase the amount of time between shaping.
How to Clean a Straw Hat
1. Cleaning a Straw Hat
2. Materials Needed:
3. Soft-bristled brush or toothbrush
4. Mild detergent
5. Water
6. Clean, soft cloth or sponge.
7. Towel
8. Hat stand or head-shaped form.
Steps
Brush Off Dust and Dirt
Start by gently brushing the entire hat with a soft-bristled brush or a clean toothbrush. Brush in the direction of the straw weave to avoid damaging the fibers.
1. Pay special attention to areas with visible dirt or stains.
2. Prepare a Cleaning Solution:.
3. In a bowl, mix a small amount of mild detergent (about a teaspoon) with lukewarm water.
4. Create a soapy solution by stirring the mixture gently.
Spot Test
Before cleaning the entire hat, you may want to spot-test the cleaning solution on an inconspicuous area of the hat to ensure it doesn’t cause any damage or color fading.
Clean the Hat
1. Dip a clean, soft cloth or sponge into the soapy water mixture.
2. Gently scrub the soiled or stained areas of the hat, working in a circular motion.
3. Avoid excessive scrubbing or rubbing, as it can weaken the straw fibers or cause fraying.
Rinse Thoroughly
1. Use a separate clean cloth or sponge dipped in clean water to rinse the hat and remove any soap residue.
2. Make sure to rinse thoroughly to prevent soap buildup, which can attract more dirt.
Blow Dry
After rinsing, gently blot the hat with a clean towel to remove excess moisture. Do not wring or twist the hat, as this can damage the straw.
Shape the Hat
If the hat has lost its shape during cleaning, you can reshape it while it’s still damp. Mold it into the desired shape and allow it to dry in that shape.
Air Dry
Place the hat in a well-ventilated area to air dry. Avoid direct sunlight and heat sources, as they can cause the straw to warp or become brittle.
Store Properly
Store your clean, dry straw hat in a cool, dry place. Use a hat box or place it during storage.
How to Reshape a Straw Hat
Reshaping a straw hat can help restore its original form or adjust it to a different style. Here are steps to reshape a straw hat:
Materials Needed
1. Clean, damp cloth or spray bottle filled with water
2. Towel
3. Head-shaped form or other shaping tools
4. Hat pins or clips
Steps
Clean the Hat
1. Before reshaping, make sure your straw hat is clean. Clean your hat if necessary.
Moisten the Hat
1. Lightly dampen the entire hat by using water. Be careful not to soak it; you want the straw to become pliable, not wet.
Reshape by Hand
1. You can curve the brim up or down, adjust the crown, or create other shape modifications.
2. For a flat brim, press it on a flat surface. For a curved brim, roll the edges with your fingers.
Use a Head-Shaped Form
If you have access to a head-shaped form or a hat block, place it inside the hat to help maintain the desired shape while it dries. Make sure the form is adjusted to the shape you want.
Secure with Hat Pins or Clips
If the hat has particularly stubborn areas or needs more precise shaping, you can use hat pins or clips to hold the straw in place. Be cautious not to damage the straw while doing this.
Dry the Hat
Allow the hat to air dry in a well-ventilated area. Avoid direct sunlight and heat sources, as these can cause the straw to become brittle or warp.
Final Check and Adjustments
1. Once the hat is dry, remove any pins, clips, or shaping tools.
2. Check the hat’s shape and make any final adjustments as needed. You can use your hands to fine-tune the shape at this point.
Store Properly
Store your reshaped straw hat in a cool, dry place. Using a hat box or a hat stand can help maintain its shape during storage.
Shaping a Straw Hat?
Shaping a straw hat involves a few careful steps to ensure you don’t damage the hat. The process generally includes moistening the hat slightly to make the straw pliable, and then gently manipulating it into the desired shape.
1. Materials Needed
2. Clean the spray bottle with water
3. Head-shaped form or other suitable object for shaping
4. Towel
5. Steam source
6. Steps to Shape a Straw Hat
Prepare Your Working Area
This will be where you place your hat during and after the shaping process.
Moisten the Hat
Lightly mist the hat, focusing on the areas you wish to reshape. The straw should become pliable, but not soaking wet. If you over-wet the straw, it could lose its strength and become misshapen.
Apply Steam
If the straw is particularly stiff or difficult to shape, you can use steam to help soften it. Hold the hat over steam from a kettle or use a garment steamer, making sure not to get too close to avoid scalding or overheating the straw.
Shape the Brim
Using your hands, gently bend and shape the brim of the hat to your desired style. For a flat brim, press it down on a flat surface. For a curved brim, gently roll the edges with your fingers or use a suitable curved object as a mold.
Shape the Crown
Carefully mold the crown of the hat with your hands. If you’re aiming for a specific crown shape (like a dent or a pinch), gently press and form the straw into place.
Use a Form
For more precise shaping, place the hat on a head-shaped form or another suitable object that matches your desired shape. This will support the hat in its new shape as it dries.
Let it Dry
Allow the hat to dry completely on the form or towel. This might take several hours or overnight, depending on the humidity and temperature. Do not use artificial heat sources as they can damage the straw.
Final Adjustments
Once the hat is dry, make any final adjustments by hand. If the brim or crown needs a bit more shaping, repeat the moistening and shaping process.
Store Properly
After reshaping, store your straw hat in a cool, dry place, preferably on a hat stand.
Tips and Cautions
Be Gentle: Straw can be delicate, so handle your hat gently to avoid cracking or breaking the fibers.
Avoid Over-Wetting: Excessive moisture can weaken and damage straw.
Check Hat Type: Some straw hats, especially those made of synthetic materials, may not respond well to reshaping. Always check the hat’s care instructions.
Professional Help: If you’re uncomfortable reshaping a valuable or antique hat, consider taking it to a professional milliner or hat specialist.
(FAQs)
Why would I want to shape a straw hat brim?
Shaping a straw hat brim allows you to customize its style and functionality. You can create different looks, such as a wide sun-blocking brim or a more curved, fashionable brim.
Can I shape any type of straw hat brim?
Most straw hats can be reshaped to some extent, but the flexibility and durability of the straw can vary. Some straw hats are more pliable and easier to shape than others.
What tools do I need to shape a straw hat brim?
You may need a clean spray bottle filled with water, a towel, and optionally, a head-shaped form or other objects to help shape the brim.
Is it necessary to moisten the brim before shaping?
Yes, moistening the brim with water is essential to make the straw pliable. It helps prevent the straw from cracking or breaking during the shaping process.
Can I use a steam iron to shape a straw hat brim?
While you can use a steam iron to soften the straw, it’s crucial to be cautious. Hold the iron a few inches away from the hat and use the steam setting without direct contact, as the heat can damage the straw.
How do I avoid over-wetting the straw hat brim?
To prevent over-wetting, use a spray bottle to lightly mist the brim rather than soaking it. Excessive moisture can weaken the straw fibers.
Can I reshape the crown of a straw hat as well?
Yes, you can reshape both the brim and crown of a straw hat. Be gentle when reshaping the crown to avoid damaging the straw.
How do I maintain the new shape while the straw hat brim dries?
You can use a head-shaped form, a bowl, or other suitable objects to maintain the shape of the brim while the hat dries. Alternatively, you can reshape the hat by hand as it dries.
What should I do if I’m not satisfied with the initial shape after drying?
If you’re not happy with the initial shape, you can repeat the moistening and shaping process. Allow the hat to dry fully between attempts.
Should I seek professional help for reshaping a straw hat brim?
If you’re uncomfortable reshaping your hat, especially if it’s valuable or delicate, consider consulting a professional milliner or hat specialist for assistance.
Conclusion
Reshaping the brim of a straw hat is a practical and creative way to personalize your hat and adjust its style to suit your needs. Whether you’re aiming for a fashion statement or functional design, the process involves moistening the brim to make the straw pliable, shaping it by hand or with the help of tools, and allowing it to dry properly to maintain the new shape.
Reshaping a straw hat brim is a simple yet effective way to extend the life of your hat and keep it both stylish and functional. With the right approach, you can easily give your straw hat a fresh look that reflects your style while protecting it for long-term use.


