Learn how to draw a dirt bike helmet. Drawing is a skill that requires practice and patience, and when it comes to drawing a dirt bike helmet, it is no different. A dirt bike helmet’s intricate details and unique shape can initially seem intimidating, but with the proper techniques and guidance, anyone can master the art of drawing one.
We will provide a step-by-step guide to drawing a dirt bike helmet, from the basic shape to the final details. Whether you are an aspiring artist or looking to improve your drawing skills, this tutorial will equip you with the tools and techniques to create a realistic, professional-looking dirt bike helmet.
So, grab your pencils, and let’s begin this exciting journey to mastering the art of drawing a dirt bike helmet.
Dirt Bike Helmet
Dirt biking has become a popular and exhilarating pastime for many adrenaline seekers. With its fast-paced nature and rugged terrain, dirt biking demands skill, agility, and a focus on safety.
A helmet is one of the most crucial pieces of equipment for any dirt biker. A dirt bike helmet is not just a fashion accessory; it is a vital piece of protective gear that can save a rider’s life.
This article will delve into dirt bike helmets, exploring their importance, key features, and advancements. This comprehensive guide educates readers on the key aspects of dirt bike helmets, from construction and design to purpose and impact.
Whether you are a seasoned dirt biker or a beginner looking to get into the sport, a proper dirt bike helmet is essential for a safe and enjoyable ride. So, let’s gear up and explore all there is to know about dirt bike helmets.
Importance of Wearing Proper Safety Gear
Proper safety gear is crucial when engaging in high-risk activities, such as dirt biking. While the adrenaline rush and thrill of the sport may be enticing, it is crucial to prioritize safety above all else. Wearing the appropriate gear, including a helmet, goggles, gloves, and protective clothing, significantly reduces the risk of severe injuries in the event of an accident.
A helmet, in particular, serves as a vital protective barrier, safeguarding the rider’s head from potential head trauma and brain injuries. Investing in quality safety gear demonstrates a commitment to personal safety, sets a positive example for others, and promotes a culture of responsibility within the dirt biking community.
Different Types of Dirt Bike Helmets
Several types of dirt bike helmets are available, each offering varying levels of protection and features. Full-face helmets offer the most comprehensive coverage, featuring a chin bar and visor that shield the entire face. These helmets are recommended for riders seeking maximum protection during off-road adventures.
On the other hand, open-face helmets cover the top and sides of the head while leaving the face exposed. They are popular among riders who prefer a wider field of vision and increased airflow. Modular helmets offer a versatile option, allowing riders to flip up the chin bar when needed.
Lastly, off-road helmets are designed for motocross and enduro riders, featuring a sun visor and enhanced ventilation for optimal performance in challenging riding conditions.
Each helmet type serves a specific purpose and caters to different rider preferences, ensuring every dirt bike enthusiast can find a helmet that meets their unique needs.
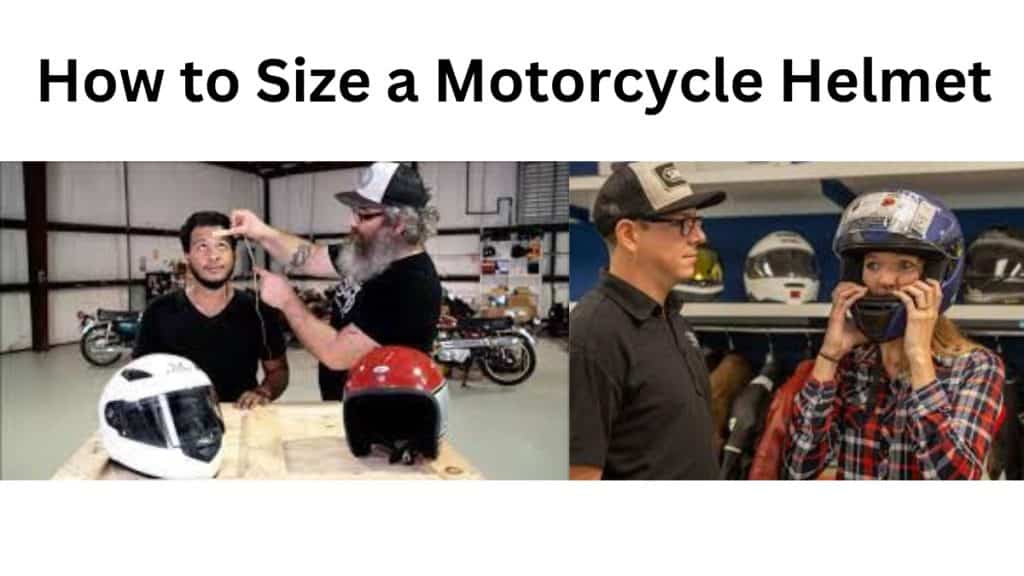
Tips for Choosing the Right Fit
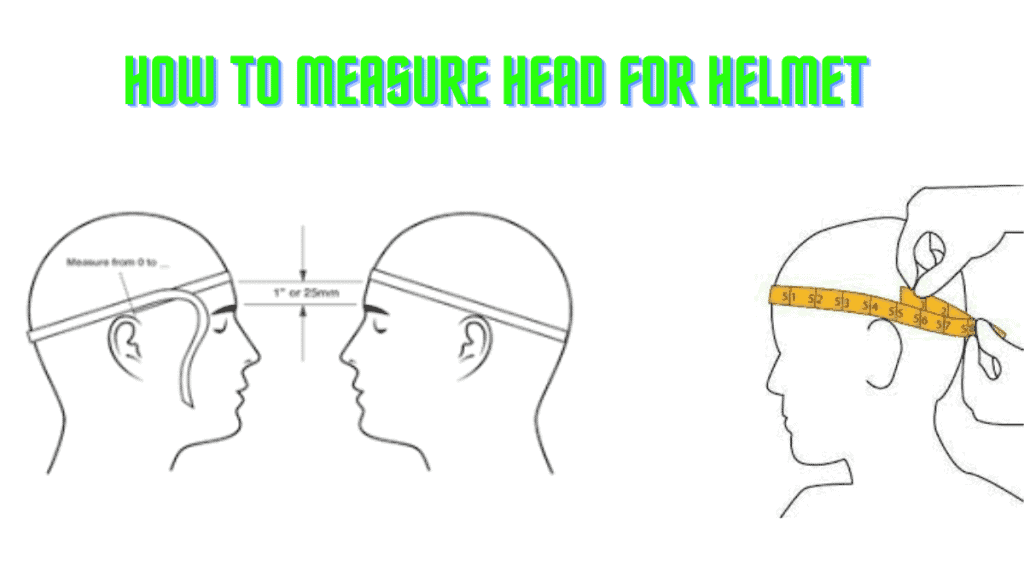
Ensuring a proper fit is paramount when selecting a dirt bike helmet. To begin, measure the circumference of your head using a flexible tape measure. This measurement will help determine the appropriate helmet size. Keep in mind that different helmet brands may have slightly different size charts.
Additionally, consider trying on helmets in person whenever possible to assess the fit and comfort. The helmet should fit snugly without being overly tight and should not shift when you shake your head.
Please pay attention to the cheek pads, as they should be in contact with your cheeks without causing discomfort or pressure points. Remember, a properly fitted helmet not only enhances safety but also ensures a more enjoyable and comfortable riding experience.
Maintenance and Care for Longevity
To maximize the longevity of your dirt bike helmet, it is crucial to practice regular maintenance and care. After each ride:
1. Be careful to inspect the helmet for any signs of damage or wear, such as cracks, dents, or loose parts. If you notice any issues, addressing them promptly by repairing or replacing the helmet is essential.
2. Keep the helmet clean by using a mild soap or helmet cleaner to remove dirt, sweat, and debris.
3. Avoid harsh chemicals or abrasive materials that may damage the helmet’s protective coating.
4. Store the helmet in a cool, dry place away from direct sunlight, extreme temperatures, or moisture, as these factors can deteriorate the helmet’s materials over time.
5. Remember, proper maintenance and care are essential for your dirt bike helmet’s longevity and safety on the trails.
Safety Standards and Certifications Explained
When it comes to ensuring the safety of dirt bike riders, understanding the various safety standards and certifications is crucial. Safety standards are guidelines set by regulatory bodies, organizations, or industry associations that outline the minimum requirements for a product to meet regarding safety.
These standards often cover impact resistance, retention systems, and peripheral vision. On the other hand, certifications are third-party assessments that verify whether a product meets the specified safety standards. These certifications assure consumers that the product has undergone rigorous testing and meets safety requirements.
Common safety standards and certifications for dirt bike helmets include DOT (Department of Transportation), Snell, and ECE (Economic Commission for Europe). It is essential to look for helmets that comply with these standards and hold relevant certifications to ensure maximum protection while riding.
A dirt bike helmet is essential equipment for any rider. Not only does it protect the rider from potential injuries, but it also provides comfort and ventilation during long rides. Choosing the right helmet for your specific needs and budget is crucial, and prioritizing safety over style is always essential.
With advanced technology and features, modern dirt bike helmets offer the perfect balance of protection and performance.
So, before you hit the trails, invest in a high-quality dirt bike helmet to ensure a safe and enjoyable ride. Ride on!
Gather Materials and References
Before beginning the process of drawing a dirt bike helmet, it is essential to gather all the necessary materials and references. Start by ensuring you have a high-quality sketchbook, drawing paper, and a range of pencils, erasers, and sharpeners. Different pencil grades, such as 2B, 4B, and 6B, will allow you to create various shading effects and add depth to your drawing.
Additionally, using a ruler or straightedge helps maintain precise lines and proportions. Gathering visual references to dirt bike helmets is also beneficial in accurately capturing their intricate details and unique design elements.
These references can include photographs, illustrations, or even actual helmets you can observe and study. Gathering appropriate materials and references prepares you for a successful, engaging drawing process.
Materials and References
1. Pencil
2. Eraser
3. Paper
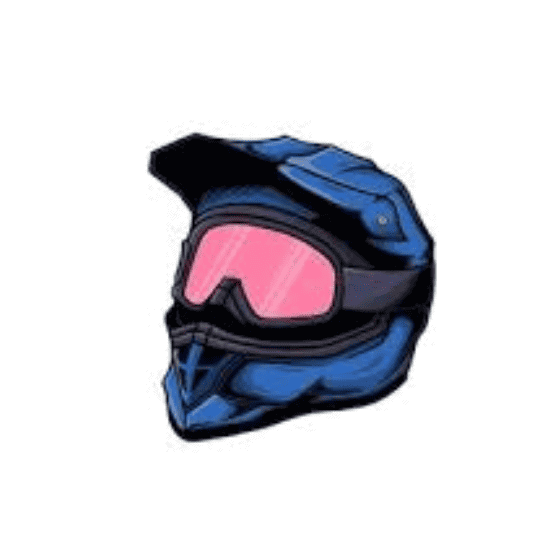
4. Dirt bike helmet reference image
5. Colored pencils or markers
6. Drawing tutorial or step-by-step guide.
Start with Basic Shapes First
When drawing a dirt bike helmet, it is essential to start with basic shapes. This approach enables you to establish a solid foundation and accurately capture the helmet’s overall structure. Start by envisioning the helmet as a combination of simple geometric forms, such as spheres, cylinders, and cones.
By breaking down the complex shape into these essential elements, you can easily map the helmet’s proportions and contours. This method simplifies the drawing process and gradually enables you to refine and add details to the initial shapes. Starting with basic shapes is essential for creating a realistic, well-proportioned drawing of a dirt bike helmet.
Steps for drawing a dirt bike helmet
1. Begin with a circle for the head
2. Draw a rectangle for the helmet’s base
3. Add two smaller rectangles for the visor
4. Draw curved lines for ventilation holes
5. Add a triangular shape for the chin guard
6. Finish with detailing and shading for a realistic look
Add Details and Shading Next
Once you have established the foundation of your dirt bike helmet drawing by outlining the basic shapes, it is time to add details and shading. This stage is crucial in bringing depth and realism to your artwork.
Pay close attention to the helmet’s intricate features, including vents, visors, and straps. Use precise lines and curves to accurately depict these elements, ensuring they align with the helmet’s overall structure.
Shading plays a significant role in creating texture and dimensionality. Determine the light source and apply shading accordingly, accounting for the helmet’s materials and surfaces.
Gradually build up the shading by layering strokes, creating highlights and shadows that enhance the three-dimensional appearance of the helmet.
Remember to maintain a steady hand and take your time to achieve the desired level of detail and realism in your dirt bike helmet drawing.
Steps for adding details and shading on a dirt bike helmet
1. Use a light pencil to sketch out design details
2. Use darker shades to add depth and dimension
3. Blend colours for a seamless effect
4. Use reference images for realistic details
5. Create shadows and highlights for a 3d effect
6. Experiment with different shading techniques for the desired look
Practice Drawing from Different Angles
To further enhance your skills in drawing a dirt bike helmet, it is essential to practice drawing from different angles. This exercise helps you understand the helmet’s structure and form more clearly, enabling you to accurately depict it from multiple perspectives. Begin by studying reference images of dirt bike helmets from various angles, observing how the shapes and proportions change when viewed from the front, side, and rear.
Then, challenge yourself to replicate these angles on paper, paying close attention to the curves, lines, and details that may appear differently from each viewpoint. By practising drawing from different angles, you will improve your ability to accurately capture the intricacies of a dirt bike helmet and enhance your overall drawing skills.
Drawing Angles
1. Front view of the helmet
2. Side view of the helmet
3. Top view of the helmet
4. Back view of the helmet
5. Three-quarter view of the helmet
6. Bottom view of the helmet
Remember to Stay Patient and Focused
As you begin learning to draw a dirt bike helmet, it is crucial to stay patient and focused. Drawing is a skill that takes time to develop and master, and it is natural to encounter challenges along the way. Frustration may arise when your drawings do not initially meet your expectations, but it is essential to persevere and not give up.
Maintaining a patient mindset allows you to grow and improve with each attempt. Additionally, staying focused on your goal will help you remain dedicated to practicing and refining your drawing techniques. Remember that progress may be gradual, but with consistent effort and a determined mindset, you will see your drawing skills for a dirt bike helmet evolve and flourish.
Drawing Tips
1. Take breaks to avoid frustration
2. Use reference images for accuracy
3. Practice basic shapes before adding details
4. Start with light sketching, then add darker lines
5. Don’t be afraid to make mistakes and try again
6. Stay focused on one section at a time to avoid overwhelm
(FAQS)
Q. What are the key features when choosing a dirt bike helmet?
When choosing a dirt bike helmet, key features to look for include a proper fit to ensure safety, certification such as DOT or Snell approval, adequate ventilation for comfort, durable construction materials like polycarbonate or carbon fiber, and additional safety features like a secure chin strap and an impact-absorbing liner. It is also essential to consider the helmet’s weight, visibility, and intended use to ensure it meets your specific needs and preferences.
Q. How often should a dirt bike helmet be replaced?
Ans: A dirt bike helmet should be replaced every five years or sooner if it has been involved in a crash or shows signs of wear and tear. Regular inspection is also essential to ensure the helmet effectively protects the rider.
Q. Are there different types of dirt bike helmets for various types of riding (e.g., motocross, trail riding, enduro)?
Ans: Yes, different types of dirt bike helmets are designed for specific riding styles, such as motocross, trail, enduro, and dual-sport. These helmets vary in features such as ventilation, weight, visor design, and overall construction to cater to the specific demands and conditions of each discipline. Choosing a helmet suitable for your riding is essential to ensure optimal protection and comfort.
Q. What are some standard safety certifications to look for in a dirt bike helmet?
Ans: When choosing a dirt bike helmet, look for safety certifications such as DOT (Department of Transportation), SNELL (Snell Memorial Foundation), and ECE (Economic Commission for Europe) to ensure the helmet meets the required safety standards.
These certifications indicate that the helmet has undergone rigorous testing and meets specific safety criteria to protect against impact during a crash. They are choosing helmets certified by reputable organizations to ensure maximum safety while riding, which is essential.
Q. How should a dirt bike helmet fit properly to ensure maximum protection?
Ans: A dirt bike helmet should fit snugly, with the top edge just above the eyebrows and the cheek pads in contact with the cheeks. The helmet should not be able to move around quickly or slide off when tilted.
A properly fitting helmet will provide maximum protection by staying securely in place during a crash, reducing the risk of head injuries. Ensure the chin strap is fastened securely and that there are no pressure points or gaps between the helmet and your head for optimal safety.
Conclusion
Drawing a dirt bike helmet is valuable for aspiring artists or designers. By following the steps outlined in this tutorial, you can create a realistic, detailed depiction of this essential piece of protective gear.
Whether you create artwork, design graphics, or want to improve your drawing skills, mastering the art of drawing a dirt bike helmet will undoubtedly enhance your abilities as an artist. So grab your pencils and prepare to add this essential skill to your repertoire!
#dirtbikeart #helmetdrawing #sketchingfun #bikelife #drawyourride #arttutorial #helmetdesign #motocrossart #creativevibes #doodleoftheday #drawingskills #artcommunity #bikerstyle #howtodraw #illustrationoftheday #motorcyclehelmet #artisticadventures #drawitlikeitscool #funwithdrawing #helmetlove #bikerdrawing #artinspiration #dirtbikefan #helmetgoals #sketchdaily #artprocess #drawingchallenge #motovibes #instaart #creativejourney