The 3M hard hat stands as a trusted and essential component of personal protective equipment (PPE) across numerous industries, including construction, manufacturing, mining, and utilities. Renowned for blending robust protection with ergonomic design, 3M designs hard hats that comply with rigorous safety standards such as ANSI/ISEA Z89.1 to deliver reliable impact resistance and electrical insulation. Wearing a certified 3M hard hat helps reduce the risk of traumatic head injuries from falling objects, impact, or electrical hazards, making it a critical piece of safety gear for workers worldwide.
In addition to superior protection, 3M hard hats incorporate advanced features designed to enhance comfort and functionality. These include adjustable suspension systems, venting options, and compatibility with accessories like face shields and hearing protection. Proper assembly and fit are vital to unlocking these benefits and ensuring the hard hat performs as intended. A securely fitted and correctly assembled 3M hard hat not only improves safety outcomes but also increases wearer compliance by maximizing comfort during prolonged use.
This article provides an in-depth, step-by-step guide on how to put together a 3M hard hat, highlighting its components, assembly process, adjustment, and maintenance. Practical insights into quality assurance, safety certifications, and upkeep ensure users gain comprehensive knowledge to maximize the protection and longevity of their equipment. By following this guide, professionals and safety officers can confidently assemble their 3M hard hats to support workplace safety standards and personal well-being.
How to Put Together a 3M Hard Hat
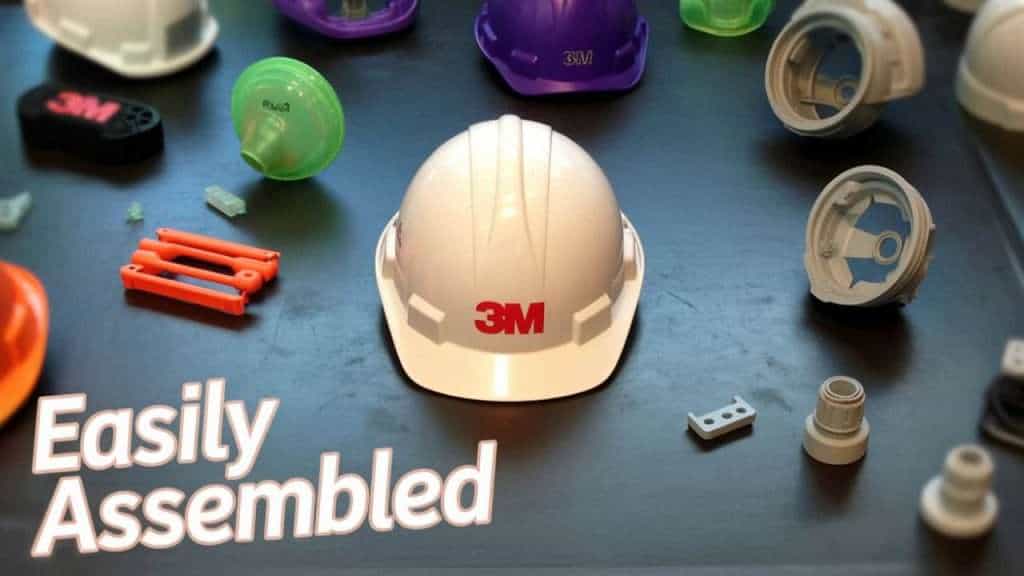
Assembling a 3M hard hat involves combining its two primary components: the hard hat shell and the internal suspension system. This process requires careful handling to maintain the structural integrity and performance that 3M guarantees. First, inspect all parts included in your package to ensure none are damaged or missing. The suspension system is often shipped separately from the shell to prevent distortion during transport.
Begin by turning the hard hat shell upside down to expose the interior mounting points. The suspension system should be oriented so that the brow pad faces the front brim of the hat, ensuring correct alignment for comfort and safety. Each suspension key or clip must be carefully inserted and secured into the matching slot on the hard hat shell. Applying steady pressure ensures the clips settle fully and firmly within the shell molding.
After securing all suspension clips, adjust the internal headband to fit your head comfortably using the ratchet or pin-lock system. Tighten the ratchet or adjust straps to achieve a snug but non-restrictive fit that will keep the hard hat stable during movement. If your model features a chin strap, attach it at the designated points and adjust its length for added stability.
Finally, perform a comprehensive fit and assembly check. The hard hat should sit level and stable on your head; the suspension should not feel loose or overly tight. Additionally, the chin strap (if used) must hold the helmet securely in place. For detailed safety and assembly instructions, 3M’s official manuals and instructional videos serve as credible resources for users seeking assurance and guidance.
Overview of the Components Included with the 3M Hard Hat
Hard Hat Shell
The hard hat shell forms the outer protective barrier, usually constructed from high-density polyethylene (HDPE) or advanced composites. The shell is engineered to absorb and disperse impact energy, reducing the chance of injury from falling objects or collisions.
Its design often includes a brim for sun and rain protection, ventilation options for air circulation, and mounting slots for accessories like face shields or earmuffs. Shells may be vented or non-vented and come in various colors and finishes, reflecting different industrial needs or company branding.
Suspension System
Inside the shell, the suspension system cradles the wearer’s head, providing a cushion that absorbs shock during impacts while ensuring a proper fit. The system usually consists of adjustable straps, a padded brow band or sweatband, and a ratchet or pin-lock headband for size adjustment. Suspension clips (also known as suspension keys) securely attach the harness to the shell, maintaining stability while remaining flexible enough to move slightly with the wearer’s head. Some 3M hard hats feature a SecureFit suspension design, providing added comfort and precise fit without the need for traditional pins or ratchets.
Chin Strap (If Applicable)
Certain 3M models offer optional chin straps to prevent the hard hat from dislodging during sudden movements or in windy conditions.
Step-by-Step Assembly of the Hard Hat Shell
| Step Number | Task Description | Detailed Instructions | Important Tips and Notes |
|---|---|---|---|
| 1 | Prepare Workspace | A clean, flat, and well-lit area is required for working on hard hat assembly. | Prevent damage and avoid losing small components. |
| 2 | Inspect All Components | Verify that the hard hat shell, suspension system, clips, and any accessories are included and in good condition. | Check for cracks, worn parts, or missing items. |
| 3 | Orient the Hard Hat Shell | Place the shell upside down with the inside facing up. | Ensure the shell is stable and clean. |
| 4 | Position Suspension System | Align the suspension with the brow pad facing the front brim of the shell. | Correct orientation is crucial for a proper fit and safety. |
| 5 | Insert First Suspension Key | Fold or bend one suspension key outwards slightly and insert it fully into the corresponding slot. | The key tip should sit just below the slot edge when secured. |
| 6 | Secure Remaining Suspension Keys | Repeat the process for the other three suspension keys, pressing firmly to snap each clip into place. | Ensure even seating; avoid forcing or twisting excessively. |
| 7 | Verify Suspension Webbing Tightness | Push down on the center webbing area with your fist to seat all clips and secure tension properly. | Helps avoid loose or twisted suspension straps. |
| 8 | Install Optional Chin Strap | If applicable, attach chin strap clips to designated anchor points on the shell sides or rear. | Confirm correct orientation and secure fit. |
| 9 | Adjust Suspension Height | If the model supports it, adjust suspension height by repositioning the height keys on both sides equally. | Keeps balance and head clearance uniform. |
| 10 | Perform Fit Adjustment | Use the ratchet wheel or the pin-lock strap to adjust the internal headband size to fit your head comfortably. | Avoid over-tightening, as this can cause discomfort or headaches. |
| 11 | Inspect Assembly | Verify that all suspension keys are flush and secure, checking for gaps or misalignments. | Loose parts weaken protection. |
| 12 | Final Clean and Ready | Wipe shell and suspension with mild soap and water if needed; dry completely before use. | Avoid harsh chemicals or solvents that degrade materials. |
| 13 | Test Wear | Place the assembled hard hat on your head, adjust the fit and the chin strap, and check for comfort and stability. | Adjust as necessary for secure wear before entering the worksite. |
This detailed table guides users through each vital step to ensure their 3M hard hat is safely and properly assembled, ready for dependable protection.
Attaching the Suspension System for Proper Fit and Comfort
Attaching the suspension system correctly inside the 3M hard hat shell is a crucial step in the assembly process. The suspension system acts as a shock absorber, distributing impact forces and preventing direct contact between the shell and the wearer’s skull.
Begin by holding the suspension system with the brow pad facing towards the front of the shell. Each suspension key must be carefully aligned with the corresponding slot molded into the hard hat’s interior. Fold or bend the key slightly outward if necessary to facilitate insertion, but avoid excessive force that might damage the key or shell.
Press each suspension key firmly into its designated slot until it snaps securely into place. Once all four keys are inserted, gently push down on the center of the webbing harness to ensure it is fully seated and tight against the shell’s interior curve. This seating prevents shifting during movement and ensures consistent protection.
Proper attachment of the suspension system enhances comfort by evenly distributing weight and improves safety by maintaining the correct clearance between the shell and the head. Misalignment or partial insertions reduce impact absorption capability and increase the risk of injury. Users should consult the 3M user manual specific to their model for details on suspension type and installation diagrams for additional accuracy.
Adjusting the Headband for a Secure Fit
The 3M hard hat features an adjustable headband integrated into the suspension system, allowing for a custom fit to accommodate various head sizes and shapes. This adjustment is crucial to ensure the hard hat stays stable while providing comfort during extended wear.
Common adjustment mechanisms include a ratchet knob or pin-lock strap system. To adjust, turn the ratchet knob counterclockwise to loosen the headband and create enough space to place the hard hat on the head. Once positioned, turn the knob clockwise slowly to tighten until the fit feels snug but not constricting.
For pin-lock systems, slide the strap through the sizing buckles and insert the pins into the corresponding holes along the headband until the size fits comfortably.
The headband should sit approximately 1 to 1.25 inches above the eyebrows and wrap evenly around the head for balanced pressure distribution. Avoid excessive tightness, which can cause headaches, or looseness, which may lead to the hat slipping during work.
Re-adjust fit frequently, especially if wearing additional headwear such as hoods or ear protection. Proper fit maximizes wearer safety and encourages compliance with PPE use.
Inserting the Chin Strap, if Applicable, for Added Stability
Some 3M hard hat models include a chin strap for enhanced helmet security, particularly useful in environments with wind, elevation, or active movements.
To attach the chin strap, identify the designated clip or snap points on the sides or rear of the shell. Connect each end of the adjustable webbing chin strap firmly to these anchor points, ensuring the clips lock or snap solidly to prevent accidental detachment.
Fit the chin strap under your chin and adjust the length for a balance of comfort and security. The strap should be tight enough to prevent dislodgement but loose enough to allow comfortable talking and breathing.
Regularly inspect the chin strap for signs of fraying, discoloration, or damaged buckles. Replace immediately if wear compromises functionality.
Using a chin strap correctly reduces the risk of the hard hat falling during sudden movement or in adverse conditions, preserving protective coverage and complying with specific workplace safety policies.
Final Adjustments and Checks to Ensure the Hard Hat Is Properly Assembled
Before using the 3M hard hat on a worksite, conduct final checks to verify proper assembly and fit:
1. Confirm all suspension keys are securely snapped into the shell slots with no visible gaps or looseness.
2. Ensure the suspension webbing is properly seated and evenly tensioned.
3. Adjust the headband for snugness, avoiding both looseness and excessive tightness.
4. Verify the chin strap (if installed) is securely fastened and comfortable.
5. Place the hard hat on your head and shake gently to test stability; it should not move or slip.
6. Check that the brim faces forward (or reverse if the manufacturer permits).
7. Inspect for any manufacturing or installation defects.
8. Clean the surface if dusty or dirty to maintain visibility and comfort.
9. Record installation and inspection in PPE logs if required for workplace compliance.
These final steps maximize the protective function of your 3M hard hat and minimize the risk of injury.
Highlighting Safety Features and Certifications of the 3M Hard Hat
3M hard hats meet or exceed leading safety standards, including:
ANSI/ISEA Z89.1: Types I and II impact protection, Classes G, E, and C for electrical insulation.
OSHA Compliance: Suitable for required PPE in regulated workplaces.
SecureFit Technology: Innovative suspension systems providing superior fit without traditional pins or ratchets in certain models.
Lightweight, Durable Materials: Specialized shells crafted from HDPE or advanced composites for high impact resistance.
Accessory Compatibility: Integrated slots for ear protection, face shields, and headlamps enhance multi-hazard protection.
Ventilation Options: Select models feature vented shells to improve airflow and wearer comfort in hot environments.
Adjustable Suspension: Ratchet and pin-lock systems accommodate a wide range of head sizes securely.
These certifications and features ensure 3M hard hats provide reliable, tested protection tailored to diverse worksite hazards.
Tips for Maintaining and Cleaning Your Hard Hat Over Time
1. Clean regularly with mild soap and water; avoid solvents, paint, and harsh chemicals that degrade materials.
2. Dry thoroughly before storage.
3. Store hard hats away from direct sunlight, heat, and chemicals to prevent brittleness.
4. Inspect for cracks, discoloration, or weakened suspension components monthly.
5. Replace suspension systems annually or sooner if damaged.
6. Avoid painting or applying unauthorized labels that may mask defects or compromise electrical properties.
7. Document inspections and replacements to comply with workplace safety programs.
8. Replace the shell every 5 years or as recommended by 3M’s guidelines.
9. Use manufacturer-recommended replacement parts for suspension or accessories.
10. Train employees on proper fitting, adjustment, and care.
Regular maintenance prolongs the life of the hard hat and preserves protective performance.
(FAQs)
Q1: Can I assemble a 3M hard hat without professional help?
A1: Yes, 3M hard hats are designed for user-friendly assembly. Following the provided instructions ensures correct setup.
Q2: How do I know if my 3M hard hat is properly fitted?
A2: It should feel snug without pressure points, remain stable during movement, and sit level with the brim facing forward.
Q3: Are all 3M hard hats compatible with chin straps?
A3: Not all, but many models offer chin strap accessories or include them by default for enhanced stability.
Q4: How often should I replace the suspension system?
A4: Manufacturers recommend replacing suspension annually or when signs of wear appear.
Q5: What if my suspension keys won’t click into place?
A5: Check alignment and orientation carefully. Use gentle pressure and avoid forcing parts that don’t fit.
Conclusion
Assembling a 3M hard hat correctly is integral to ensuring the wearer’s safety on potentially hazardous work sites. From careful inspection of components and secure attachment of the suspension to precise fit adjustments and optional chin strap installation, each step contributes to the effective performance of this essential PPE. By adhering to manufacturer guidelines and employing proper maintenance practices, users can maximize the protective benefits of their 3M hard hats, enhance comfort, and comply with stringent workplace safety standards.
Investing time to understand assembly and upkeep not only protects lives but supports a culture of safety and professionalism in every industry relying on head protection. For additional guidance, 3M’s official resources serve as authoritative references ensuring best practices are followed. Proper setup combined with regular inspection guarantees your hard hat delivers dependable, comfortable, and certified safety for years to come.
#3MHardHat #PPEAssembly #WorkplaceSafety #ConstructionSafety #HeadProtection #OSHACompliance #SafetyGear #HardHatFit #IndustrialSafety #CertifiedPPE


