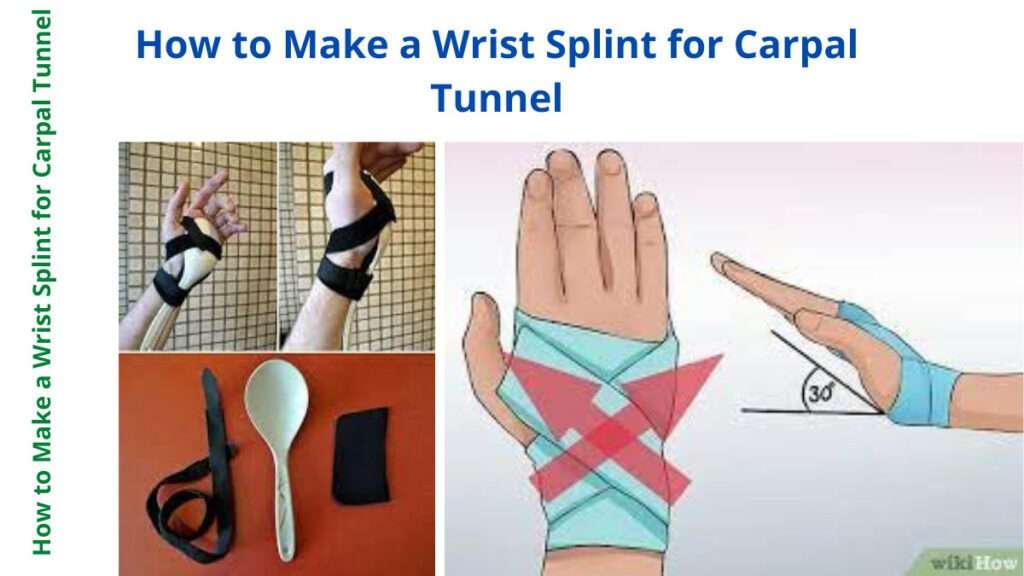
Are you suffering from wrist pain? If so, you might consider using a Promedics Wrist Brace to provide support and stabilization. The Promedics Wrist Brace is a lightweight, adjustable medical-grade brace designed to help protect your wrist from further harm.
It helps immobilize the wrist joint and reduce pain, making it a great choice for those with carpal tunnel syndrome, wrist fractures, tendonitis, and other wrist-related injuries.
But if you’ve never used a wrist brace before, you may have questions about how to put it on correctly. Here’s a quick guide to help you get the most out of your Promedics Wrist Brace and achieve optimal support and relief.
Please check another keyword: Best Carpal Tunnel Brace for Sleeping
Wrist Brace
A wrist brace is an orthopedic device designed to stabilize the wrist joint and surrounding tissues while allowing a limited range of motion. Wrist Braces are often used to treat injuries such as sprains and fractures, as well as chronic conditions like arthritis. They are also commonly used to prevent injuries during activities that put stress on the wrist joint.
Wrist Braces come in a variety of shapes and sizes, depending on the level of support needed. Some Wrist Braces are made from highly breathable materials that allow for comfortable all-day wear, while others are designed for more intense activity and provide greater stability. A wrist brace can be custom-fit by a medical professional or purchased over the counter in various sizes.
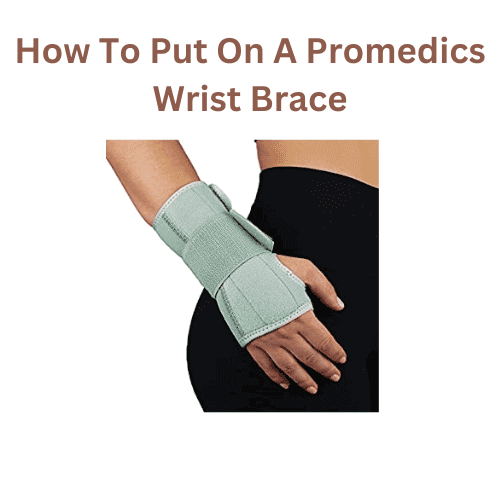
How To Put On A Promedics Wrist Brace: Your Comprehensive Guide
The wrist brace is necessary for managing pain, injuries, or conditions such as carpal tunnel syndrome. If you’re on this page, you’re likely looking for instructions for wearing the Promedics wrist brace. This post will provide specific, step-by-step guidelines for doing this while ensuring maximum efficiency and comfort.
The Importance of Properly Wearing a Wrist Brace
When recovering from an injury, struggling with chronic pain, or trying to reduce stress, wearing an appropriate wrist brace is essential. The National Institute for Occupational Safety and Health (NIOSH) reports that approximately 36% of people experience carpal tunnel symptoms, which can be significantly alleviated by the proper use of wrist braces. Thus, wrist braces offer hope for a more comfortable and pain-free future.
The Promedics wrist braces have been meticulously designed to provide optimal support and comfort, helping relax the wrists and ease tension in the affected area. This guide ensures that you can fully utilize these benefits, walking you through every step of the process, from preparation to adjustments, to give you confidence in your choice of wrist brace.
Why Choose a Promedics Wrist Brace?
Before we get deep into”the “how, let’s talk about the “why.” Promedics wrist braces stand out from the marketplace for a variety of reasons:
Comfort: High-quality fabrics ensure all-day wearability. Support helps stabilize the wrist with a solid force to reduce stress.
Flexibility: Characteristics of easy-to-use straps that allow you to customize the fit.
Start using the Promedics wrist brace today to maximize its benefits.
Step 1: Groundwork
First, ensure that you and your wrist brace are in good condition. Proper preparation can significantly ease the application process and increase the effectiveness of your wrist brace.
Cleanse Your Wrist
Wash your wrists to remove debris or oils that irritate your skin. What is the significance of this clean skin? It reduces the risk of irritation and infection, providing a pleasant sensation.
Check the Brace
Check your Promedics wrist brace for signs of wear, such as ragged edges or stretching.
This is important because damaged braces may provide inadequate support and worsen your situation.
Step 2: Positioning Your Wrist Brace
Proper positioning is crucial for the brace to function as intended. Follow these steps to ensure the perfect alignment.
Lay Out the Brace
Take off any straps, then lay the brace flat on its side. This makes it easy to wrap the brace around the wrist.
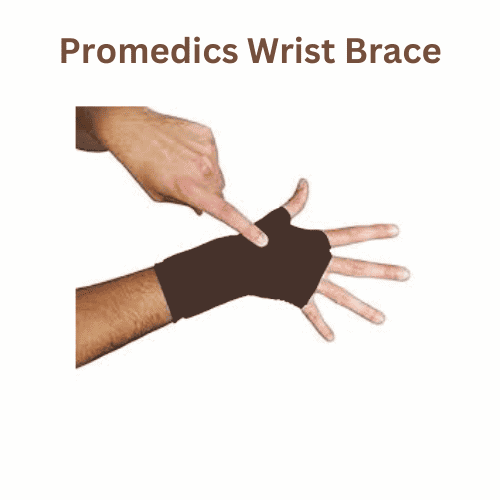
Insert Your Hand
Place your hands into the brace. Make sure your thumb is snugly inserted into the hole. A sturdy support is placed along the lower part of your wrist.
What is the significance of this? Proper alignment will ensure the support is in the correct area and provide maximum comfort.
Step 3: Fastening the Straps
You can fasten the straps when your hands are properly aligned within the brace.
Start by using the Base Strap
Place the strap on the base of the wrist and secure it at a comfortable angle.
Pro Tip: Start by placing the strap in front of your wrist to ensure stability of your base.
Secure the Remaining Straps
Then, fasten the rest of the straps as you move toward your forearm.
Data Point: Based on a study published in the Journal of Orthopedic & Sports Physical Therapy, incorrect fixation can diminish the effectiveness of the brace by as much as 30%.
Step 4: Adjust for Comfort and Fit
Once you’ve secured the straps, take a couple of minutes to adjust your brace for a perfect fit.
Check for Tightness
The mount should fit snugly, but not too tightly. It should allow you to move your fingers freely.
Tips: Remove the straps if you feel tingling or loss of sensation.
Test the Range of Motion
You must be able to complete simple movements without discomfort. The brace must limit dangerous or painful movements, but it should also allow normal activities.
How to Put on a Wrist Brace?
Promedics wrist braces are designed to provide support, stability, and comfort. The brace is adjustable, allowing you to find the perfect fit for your needs.
Putting on a Promedics wrist brace correctly ensures that it works properly and provides the maximum benefit. Here is a step-by-step guide to putting on your Promedics wrist brace.
Step 1: Prepare the Brace
Before putting on your brace, ensure it is clean and free from any debris that could irritate your skin or reduce its effectiveness. Make sure all fasteners are securely closed before use.
Step 2: Position the Brace
Lay the brace flat with the cushion facing up. Place your hand in the center of the cushion so that each finger slot fits snugly around your fingers and the thumb slot fits over your thumb. Ensure all straps are positioned outside your palm area.
Step 3: Put On the Wrist Brace
Starting at the bottom of your hand, wrap the bottom strap around your wrist and fasten it securely but not too tightly.
Repeat this process for each strap, moving up in order until you reach the top of your hand, where you can attach the top strap around your arm just above your elbow joint.
Ensure each strap is secured but comfortable as you progress upwards. If necessary, loosen or tighten the straps until you achieve a comfortable fit that holds firmly in place during movement or activities requiring brace support.
Tips and Tricks
Assuming you have already purchased your wrist brace, let’s explore some Tips and tricks for using it.
1. First, it is important that you adjust the Velcro straps so that the brace is snug but not too tight. You should be able to move your fingers and thumb relatively freely while the brace is on
2. The second tip is to make sure you are wearing the brace on the correct wrist. If you are right-handed, you will want to wear the brace on your left wrist and vice versa
3. The third tip is to experiment with different exercises while wearing the brace. For example, try doing some light dumbbell curls or lifting small objects like a can of soup
4. Last but not least, be patient! It takes time for the muscles and tendons in your wrist to adjust to the brace. Try wearing it for a few hours each day and gradually increase the amount of time as your pain decreases
(FAQs)
Q: What is a Promedics wrist brace?
A: A Promedics wrist brace is a medical device designed to provide support and immobilization to the wrist joint. It can be used to alleviate pain and discomfort associated with conditions such as carpal tunnel syndrome, sprains, and strains.
Q: How do I put on a Promedics wrist brace?
A: To put on a Promedics wrist brace, follow these steps:
1. Start by adjusting the strap on the brace so that it fits comfortably around your wrist.
2. Place your hand into the brace, making sure that your fingers are lined up with the opening at the end of the brace.
3. Hold the brace in place with one hand and use the other hand to wrap the strap around your wrist.
4. Secure the strap by attaching it to the hook and loop closure on the brace.
Q: Can I wear a Promedics wrist brace all day?
A: The length of time that you can wear a Promedics wrist brace will depend on the severity of your condition and your doctor’s recommendations. It is generally safe to wear a wrist brace for extended periods, but it is essential to take it off periodically to allow your skin to breathe and perform wrist exercises to prevent stiffness.
Q: Can I wear a Promedics wrist brace while sleeping?
A: Yes, you can wear a Promedics wrist brace while sleeping if recommended by your doctor. This can help prevent painful movements or positions during sleep that could exacerbate your condition.
Q: How tight should a Promedics wrist brace be?
A: A Promedics wrist brace should be snug, but not so tight that it causes discomfort or restricts circulation.
If you experience any discomfort, loosen the strap slightly or adjust the brace to make it more comfortable.
Q: How do I clean my Promedics wrist brace?
A: To clean your Promedics wrist brace, hand-wash it in cool water with a mild detergent. Rinse thoroughly and allow it to air dry completely before using it again. Do not machine wash or dry your wrist brace, as this could damage the material.
Conclusion
Putting on a Promedics wrist brace correctly ensures that it works properly and provides the maximum benefit. Following this guide and taking note of the tips and tricks mentioned above will help you adjust to wearing the brace comfortably and allow your wrists to heal properly.
A Promedics wrist brace is designed to provide support, stability, and comfort for your wrists during activities such as typing or lifting weights. With the right care and attention, you can use a Promedics wrist brace to effectively improve your condition and return to an active lifestyle.
#WristBrace #Promedics #HowTo #BraceYourself #InjurySupport #WristCare #HealthTips #DIYBrace #HealingJourney #InjuryPrevention #ComfortFirst #BraceLife #StayActive #FitTips #WristSupport #EasyGuide #HandyHelp #WristWrap #PromedicsGuide #BraceItUp #HealthyHands #InjuryRecovery #PainRelief #WristWellness #SupportYourself #WristProtection #FlexibilityMatters #ActiveLifestyle #CareForYourself #BraceOn