Door locks are essential for security and privacy, but over time, various issues can affect their performance. Frequent use, environmental conditions, and mechanical wear can cause locks to become jammed, loose, or fail to operate smoothly. Understanding the common problems that affect door locks is the first step toward effective repair and maintenance.
Some of the most frequent issues include difficulty turning the key, a loose or wobbly lock mechanism, a misaligned latch and strike plate, or complete failure of the lock to close or open. These problems not only compromise security but can also cause inconvenience and potential lockouts. Timely identification and fixing of these issues prevent escalation and expensive replacements.
Environmental factors such as dust, dirt, moisture, and rust can accumulate within the lock mechanism, causing stiffness or corrosion. Additionally, wear from repeated use or forced entry attempts can damage internal parts like pins, springs, or tumblers. Understanding how these elements contribute to lock failure empowers homeowners to take preventive and corrective action.
This guide provides detailed instructions on how to fix a door lock, from diagnosing common problems and gathering proper tools to disassembling, cleaning, repairing, and reassembling the lock. Along with expert tips and troubleshooting, this resource ensures that even non-experts can confidently resolve many lock issues themselves, improving security and saving money. For comprehensive information on lock types and repair tips, resources like Locksmith Ledger and HowToGeek offer valuable insights.
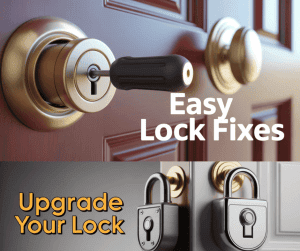
How to Fix Door Lock
Fixing a door lock involves diagnosing the nature of the problem and then applying appropriate techniques such as cleaning, lubricating, tightening, or replacing damaged components. The process starts by identifying symptoms, including difficulty turning the key, jamming bolts, or door misalignment. Many lock problems are caused by dirt or debris accumulation inside the lock cylinder. Before assuming damage, it is wise to try cleaning and lubricating the lock, which often restores smooth operation.
If the lock mechanism is physically damaged or loose, disassembling the lock enables inspection of internal parts like pins, springs, and the bolt or latch. Tightening screws and adjusting alignment can fix loose or misaligned components that interfere with lock operation. Replacement of worn parts may be necessary in severe cases.
Understanding different lock types—deadbolts, knob locks, lever handles, or electronic smart locks—is also important because repair methods vary. Mechanical locks typically require manual cleaning and lubrication, whereas electronic models may involve resetting or battery replacement.
Many homeowners find that following a guided, stepwise approach reduces trial and error, avoids costly mistakes, and ensures secure door operation. Besides self-help guides, professional locksmith services and tutorials from Family Handyman can provide additional practical advice for complex repairs.
Tools Needed for Fixing a Door Lock
Successful door lock repair requires having the right tools handy. Having all necessary equipment before beginning the job saves time and prevents damage to lock components or doors. Essential tools include:
Screwdrivers: Both Phillips and flathead screwdrivers in various sizes are needed to remove screws holding lock components and strike plates. Versatile screwdriver sets with interchangeable bits streamline the process.
Lubricants: Graphite powder or silicone-based lubricant is recommended for cleaning and lubricating the internal lock parts. Avoid oil-based lubricants because they attract dust and cause buildup.
Additional useful tools include:
Tweezers or Needle-Nose Pliers: Helpful for handling small springs, pins, or tumblers inside the lock.
Cleaning Brushes or Compressed Air: For removing dirt, dust, and debris from lock components.
Measuring Tape: Useful if parts need measurement for replacement or ensuring proper fit during reassembly.
Equipping yourself with the right tools reduces risks of damaging delicate parts inside the lock. It also enables thorough cleaning and proper maintenance, which prevents lock malfunctions and extends overall lifespan.
Step-by-Step Guide on How to Remove the Lock
| Step Number | Task Description | Tools Needed | Details | Tips and Cautions |
|---|---|---|---|---|
| 1 | Prepare your work area | Screwdriver, flashlight | Clear the area surrounding the door for easy access and adequate lighting. | Turn off any nearby electronic lock alarms before starting. |
| 2 | Remove screws on the interior knob or lever | Phillips screwdriver | Unscrew all visible screws holding the lock to the door. | Keep screws organized for reassembly. |
| 3 | Take off the interior knob/lever | Hands or flathead screwdriver | Gently pull off the interior knob/lever. | Apply gentle wiggling if stuck, avoid excessive force. |
| 4 | Remove the exterior knob/lever | Hands or flathead screwdriver | Pull off the exterior knob. | If keyed lock, ensure you turn to unlock before removal. |
| 5 | Extract the latch mechanism | Phillips screwdriver | Unscrew and gently remove the latch from the edge of the door. | Note orientation of latch for accurate reassembly. |
| 6 | Remove the strike plate on the door frame | Phillips screwdriver | Unscrew the strike plate locking the bolt to the door jamb. | Inspect frame for damage or alignment issues. |
| 7 | Disassemble lock cylinder if necessary | Screwdrivers, tweezers | Remove retaining screws and carefully separate lock cylinder components. | Lay out parts systematically for easier reassembly. |
| 8 | Clean lock parts with compressed air or brush | Cleaning brush, compressed air | Remove all dirt, debris, or rust from all lock components. | Avoid damaging pins and springs within the cylinder. |
| 9 | Inspect each component for wear or damage | Inspection | Look for bent springs, worn pins, rust spots, or broken parts. | Replace damaged parts as necessary. |
| 10 | Store removed parts safely until repair | Container or tray | Keep parts organized and avoid mixing up small pieces. | Prevent loss or misplacement during repair process. |
This meticulous removal process ensures you disassemble the lock without damage, facilitating effective repair or replacement of problematic parts.
Inspecting the Lock Mechanism for Damage or Debris
Once the lock is removed, a detailed inspection is necessary to diagnose issues effectively. Start by examining the lock cylinder for any visible dents, cracks, or warping. Check the condition of internal pins and springs, which can wear down or break after extensive use. Bent, rusted, or missing parts often cause jams or failed lock operation.
Look for debris accumulation inside the lock case and cylinder. Dust, lint, or small particles can impede the smooth movement of pins and tumblers. This buildup is common, especially in older locks or those exposed to dirt or humidity.
Also inspect the latch mechanism for signs of damage or wear. Check if the bolt extends and retracts freely without sticking. An obstructed or bent bolt reduces security and functionality.
Evaluating the strike plate on the door frame is important, ensuring the bolt fits perfectly into the hole without resistance. A misaligned strike plate often causes locking difficulties, even if the lock itself is in good shape.
Thorough inspection allows identification of the exact cause of lock malfunction, guiding focused cleaning, repair, or part replacement to restore effective operation.
How to Clean and Lubricate the Lock Properly
Effective cleaning and lubrication revitalize lock performance and prevent premature wear. Begin by blowing compressed air into the keyhole and cylinder to remove loose dirt and dust. For stubborn debris, use a soft brush or toothpick carefully to avoid damaging delicate pins.
Avoid household grease or oil as lubricants, which create sticky residues attracting further dirt. Instead, apply graphite powder or a silicone-based lubricant specially designed for locks. Insert the lubricant nozzle into the keyhole and spray or puff lightly, then insert and turn the key several times to distribute evenly.
Lubricate other moving parts like latch bolts and strike plates to ensure smooth sliding and reduce friction. Proper lubrication minimizes jamming and wear, allowing the lock to operate quietly and effortlessly.
Clean external surfaces of the lock with a damp cloth to remove grime or oxidation, protecting the finish and improving appearance.
Reassembling the Lock Mechanism
Reassembling the lock requires careful attention to the order and orientation of parts removed. Begin by placing pins, springs, and tumblers back into their original positions inside the cylinder, ensuring each fits properly without binding.
Secure the cylinder housing carefully, verifying smooth rotation with the key before proceeding. Reattach internal bolts and moving parts like the latch mechanism, ensuring correct positioning consistent with earlier inspection notes.
Tighten screws just enough to hold elements firmly without causing deformation or resistance. Over-tightening can lead to malfunction or rapid wear.
Test the lock mechanism on a workbench or door section before final installation to confirm it operates freely and as intended.
Keeping parts organized and referring to manufacturer diagrams or photographs from the disassembly step significantly aids correct reassembly.
Reinstalling the Lock into the Door
With the lock mechanism correctly reassembled, reinstall it into the door carefully. Insert the latch bolt into the edge hole with the bevel facing the door jamb, enabling proper closure.
Feed the exterior and interior knobs or cylinder components into their holes, aligning the spindle through the latch. Secure all parts with screws tightened evenly to avoid misalignment or loose hardware.
Next, reattach the strike plate on the door frame, ensuring it corresponds perfectly with the latch bolt for smooth engagement. Use longer screws (3 inches or more) where possible to anchor into solid wood for improved durability against forced entry.
Close and open the door several times gently to check for smooth operation and solid closing. Repeat minor adjustments if the door sticks or the lock misaligns.
Testing the Lock to Ensure Proper Function
Once installed, comprehensive testing verifies lock functionality and durability. Test locking and unlocking from both sides using the key, knob, or thumb turn. Ensure smooth rotation without excessive force.
Confirm the bolt fully extends into the strike plate on locking and retracts completely when unlocking to secure the door properly.
Try closing the door from various angles to verify latch engagement without sticking or resistance. Check for unusual noises or grinding, which suggest misalignment or internal problems.
For electronic locks, confirm battery power, app connectivity, and alternate unlocking methods function properly.
Repeat testing several times to ensure consistent operation, making small adjustments as necessary for optimum performance.
Troubleshooting Tips for Persistent Door Lock Issues
If problems persist after repair, consider the following troubleshooting tips:
Key Won’t Turn: Check for worn keys and try a spare. Lubricate the lock and verify the door is aligned correctly.
Lock Sticks or Jams: Inspect for debris or damaged pins. Re-lubricate and realign the strike plate.
Loose or Wobbly Lock: Tighten screws systematically or replace stripped screws.
Latch Doesn’t Catch: Adjust strike plate position or enlarge its hole slightly to improve fit.
Electronic Locks Not Responding: Reset the lock, check batteries, and ensure app firmware is current.
If these measures fail, professional locksmith assistance may be necessary to replace internal lock components or upgrade the lock entirely.
(FAQs)
Q1: Can I fix all door lock problems myself?
Ans: Many common issues like cleaning, lubrication, and tightening screws can be DIY tasks; however, complex mechanical failures or electronic malfunctions often require professional help.
Q2: How often should I maintain my door locks?
Ans: Regular maintenance every six months is recommended, especially lubrication and cleaning.
Q3: What lubricant should I avoid?
Ans: Avoid using oil-based lubricants such as WD-40 inside lock cylinders as they attract dust and debris, causing further jams.
Q4: When should I replace my door lock?
Ans: Replace locks if parts are broken, extensively worn, or if you need enhanced security features.
Conclusion
Door lock issues, while common, do not need to be a nuisance or a security risk. With the right tools, knowledge, and systematic steps, most lock problems can be resolved at Home effectively. Proper cleaning, inspection, lubrication, and careful reassembly help restore locks to full function and prolong their lifespan.
Following the detailed removal, repair, and installation processes discussed ensures your lock performs smoothly and securely, preventing frustrating lockouts and enhancing property protection. Avoiding common mistakes during repair and maintaining regular upkeep significantly reduces recurring problems.
In cases of persistent or complicated malfunctions, professional locksmith services complement DIY efforts, ensuring safety and reliability. With these practical insights, you are empowered to fix your door locks confidently and maintain robust home security.
#FixDoorLock #LockRepair #HomeSecurity #DIYLockFix #DoorLockMaintenance #LockCleaning #LockTroubleshooting #LockReassembly #SecureHome #LockTools