Do you know how to clean your bike helmet? Is it a bit grimy, sick, or still plashed with mire from that excellent trail lift last weekend? Norway terror – drawing your helmet is veritably easy. In just a few simple ways, you can return it to its candid defensive glory.
Wash your helmet with a mild cleaner and water. You can use a rag or sponge to gently remove any dirt. And don’t forget to wash the strips – just rub a little mild cleaner into them and wash them with water. When your helmet is clean, store it in a safe, dry place.
Don’t run your helmet through the dishwasher, washing machine, or auto wash. No power washers, moreover. These can damage your helmet. Just wash it gently by hand. Your helmet protects your head; treat it well.
Bike Helmet
Cleaning your bike helmet is essential to maintaining its safety, comfort, and longevity. Here are some additional tips and information regarding the cleaning of bike helmets:
Frequency of Cleaning: It’s good practice to clean your bike helmet regularly, especially if you ride frequently or sweat a lot.
Aim to clean your helmet at least once a month during the riding season, and more often if it becomes visibly dirty or smelly.
Pre-Cleaning Inspection: Before cleaning your helmet, give it a quick inspection for any visible damage or cracks. If you find any, you should consider replacing the helmet, as structural integrity is crucial for safety.
Pads and Liners: The interior pads and liners can absorb sweat and become dirty over time. Check whether your helmet has removable pads and liners that can be hand-washed separately.
Cleaning Products: Use mild soap or baby shampoo to clean your helmet. Avoid using harsh detergents or chemicals, as they can degrade the helmet’s materials.
Never use solvents, gasoline, or abrasive cleaners, as they can damage the helmet’s shell and foam.
Thorough Rinse: After cleaning the helmet with soapy water, rinse it thoroughly to remove all soap residue. Soap residue can irritate your skin and eyes and damage the helmet’s materials.
Odor Control: If your helmet develops an unpleasant odor, add a small amount of baking soda to the water during cleaning. Baking soda can help neutralize odors.
Storage: When not in use, store your helmet in a cool, dry place away from direct sunlight and extreme temperatures. This helps prevent the helmet’s materials from degrading over time.
Replacement: Helmets have a limited lifespan, and their protective qualities can degrade over time. If your helmet has been in a significant impact or shows signs of wear and tear, it’s important to replace it.
Label Information: Look for a label inside your helmet, usually near the foam liner, that may provide manufacturer-recommended cleaning and care instructions.
Properly cleaning and maintaining your bike helmet not only helps ensure it remains hygienic but also provides optimal protection in the event of an accident.
How to Clean a Bike Helmet
Cleaning your bike helmet is essential to maintain its hygiene and extend its lifespan. Here’s a step-by-step guide on how to clean your bike helmet:
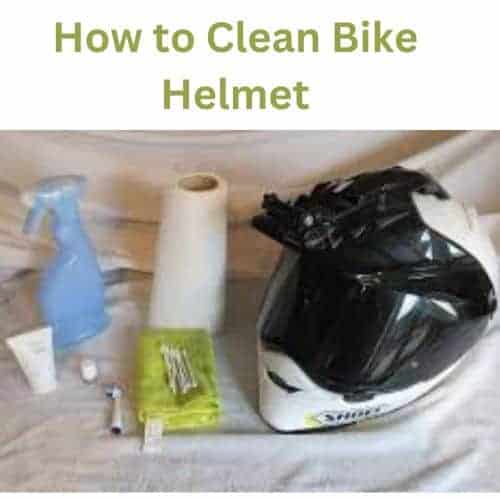
Materials you’ll need
1. Mild soap or baby shampoo
2. Warm water
3. Soft cloth or sponge
4. Toothbrush (optional)
5. Towel or paper towels
6. A small brush
7. Water bucket or basin
Steps
Remove Detachable Parts: If your helmet has removable pads or liners, take them out according to the manufacturer’s instructions. These parts can often be hand-washed separately.
Arrange a Cleaning Solution: Fill a bucket or basin with warm water. Add a few drops of mild soap or baby shampoo to the water. Avoid using harsh chemicals that could damage the helmet’s materials or the foam inside.
Wash the Exterior
a. Dip a soft cloth or sponge into the soapy water, then gently clean the exterior of the helmet. Pay special attention to areas with sweat, dirt, or grime buildup.
b. For stubborn dirt or small crevices, you can use an old toothbrush to scrub gently. Be careful not to apply excessive force, which could damage the helmet’s structure or finish.
Rinse: Thoroughly rinse the helmet with clean water to remove any soap residue. Ensure there is no soapy residue, as it can irritate the skin and eyes.
Clean the Straps: Submerge the helmet’s straps in soapy water and gently agitate them. Then, rinse them thoroughly to remove any soap residue. Make sure the straps are completely dry before using the helmet again.
Dry the Helmet
a. Shake off excess water from the helmet.
b. Pat the helmet gently with a towel or paper towel to remove the remaining moisture.
c. Permit the helmet to air dry from top to bottom before using it again. Avoid using direct heat sources, such as hairdryers or radiators, as they can damage the helmet’s materials.
Reassemble: Once everything is dry, reassemble the helmet, including any removable pads or liners.
Inspect: Before using the helmet, carefully check it for any signs of damage or wear, such as cracks, dents, or loose parts. If you find any issues, consider replacing the helmet for your safety.
Maintenance: To keep your helmet clean, wipe the exterior regularly with a damp cloth, especially after sweaty rides. This will help prevent the buildup of grime and odors.
Do Bike Helmets Need Cleaning?
Yes, bike helmets should be cleaned periodically to maintain their safety and hygiene. Here are some tips on cleaning bike helmets:
Regular Wipe Down: After every ride, it’s good practice to wipe down your helmet with a damp cloth or a mild soapy solution. This will help remove sweat, dirt, and grime from the exterior.
Remove Pads and Straps: Many bike helmets come with removable pads and straps. These can be taken out and hand-washed with mild soap and warm water. Make sure they are dried out before reattaching them to the helmet.
Ventilation: Clean the vents with a soft brush or compressed air. This will help to maintain proper airflow and keep the helmet smelling fresh.
Shell Cleaning: For the helmet’s outer shell, use a mild detergent and a soft cloth to remove stubborn dirt or stains.
Dry Properly: After cleaning, ensure the helmet is completely dry before reusing it. Sending it damp can lead to mold or mushroom growth.
Inspect for Damage: While cleaning, take the opportunity to inspect your helmet for any signs of damage, such as cracks, dents, or compromised straps. If you find any damage, it may be time to replace your helmet.
Helmets have a limited lifespan due to wear and tear. Replace your helmet if it’s been in a crash, shows signs of aging, or no longer meets current safety standards. Typically, helmets should be replaced every 3-5 years, even if they haven’t been in a crash.
Can I Put My Helmet in the Dishwasher?
It’s generally not recommended to put your helmet in the dishwasher. Most helmets, including bike, motorcycle, and sports helmets, are not designed to withstand the heat, moisture, and harsh detergents used in dishwashers. Cleaning your helmet in a dishwasher can damage its materials, affect its structural integrity, and compromise its safety.
To clean your helmet, follow the manufacturer’s instructions, typically provided in the user manual or on the manufacturer’s website. In most cases, you can clean the exterior of the helmet with mild soapy water and a soft cloth or sponge. Avoid using abrasive materials or harsh chemicals that can damage the helmet’s surface.
The inner padding and straps of the helmet can absorb sweat and may need occasional cleaning. You can often remove these parts, following the manufacturer’s instructions, and hand-wash them with mild detergent, rinse thoroughly, and air-dry. Be sure to reassemble the helmet properly after cleaning.
Can I Put My Helmet in a Washing Machine?
In general, it is not recommended to put a helmet in a washing machine, as the machine’s agitation and heat can potentially damage the helmet and its structural integrity.
Helmets are typically constructed with various materials, including foam padding, plastic shells, and sometimes even metal components, and subjecting them to a washing machine can lead to:
Damage to the shell: The plastic shell of a helmet can become deformed or cracked in a washing machine, compromising its protective function.
Degradation of foam padding: Foam padding in a helmet can absorb water and detergents, leading to deterioration or loss of its cushioning properties. This can reduce the helmet’s ability to absorb impacts effectively.
Rust or corrosion: If your helmet has metal components such as buckles or clips, the washing machine’s water and detergent can cause rust or corrosion over time.
To clean your helmet, it’s better to follow these alternative methods:
Spot Cleaning: Use a damp cloth, mild soap, and water to clean the outer shell and straps. Be sure to wipe away any soap residue and allow the helmet to air dry.
Remove Pads: Many helmets have removable and washable padding. Check the manufacturer’s instructions, and if your helmet has removable pads, take them out and wash them separately by hand.
Air Out: After a sweaty ride or if your helmet has developed an odor, simply let it air out in a well-ventilated area. You can also use a helmet deodorizer or a mild disinfectant spray.
Helmet Covers: Some people use removable, machine-washable helmet covers to help keep the helmet clean.
Bike Helmet Disinfectant Spray
To disinfect a bike helmet, use a spray that is safe for the helmet’s materials and your skin. Here are the steps to disinfect your bike helmet:
Gather Your Supplies
Disinfectant spray: Look for a disinfectant spray suitable for helmets and ensure it’s safe for the materials your helmet is made of (usually plastic, foam, and fabric).
Soft cloth or paper towels: You’ll need something to wipe down the helmet after applying the spray.
Preparation
Start by removing any detachable parts from the helmet, such as the padding and straps, if possible.
If there is visible dirt or debris on the helmet’s surface, gently wipe it away with a damp cloth before disinfecting.
Spray Application
Hold the disinfectant spray about 6-8 inches away from the helmet.
Spray the disinfectant evenly over the entire surface of the helmet. Ensure you cover all areas thoroughly.
Pay extra attention to areas that come into contact with your skin, such as the interior foam padding.
Dwell Time
Allow the disinfectant to sit on the helmet surface for the recommended dwell time. This time can vary depending on the specific disinfectant you’re using, so be sure to check the product label for instructions.
Wiping Down
After the appropriate dwell time has elapsed, use a soft cloth or paper towel to wipe the entire helmet surface. This helps remove any residual disinfectant and ensures it’s safe for use.
Reassembly
If you removed any parts, like padding and straps, reattach them once the helmet is dry.
Drying
Allow the helmet to air dry completely before using it. Avoid using any external heat sources to speed up the drying process, as this could damage the helmet’s materials.
Regular Maintenance
To keep your helmet clean and safe, make it a habit to clean it periodically. You don’t need to disinfect it every time; regular cleaning with mild soap and water can help maintain its cleanliness.
Why Should You Clean Your Bike Helmet?
Cleaning your bike helmet is important for several reasons:
Hygiene: Sweat, dirt, and bacteria can accumulate inside your helmet over time. Regular cleaning helps prevent the growth of odor-causing bacteria and ensures your helmet remains hygienic and comfortable to wear.
Safety: A dirty helmet can reduce its effectiveness in protecting your head in a crash. Dust and grime can compromise the structural integrity of the helmet’s shell and inner padding, reducing its impact-absorption effectiveness.
Visibility: A clean helmet with a clear visor or face shield improves visibility while riding. A dirty or smudged visor can obstruct your vision, which can be dangerous, especially in adverse weather conditions.
Longevity: Regular cleaning can help extend your helmet’s lifespan. Helmets are an investment in safety, and proper maintenance can ensure they last longer and remain in good condition.
Performance: Properly cleaning and maintaining your helmet can help it perform optimally. This includes keeping vents and air channels clear, which improves ventilation and helps you stay comfortable during rides.
How Do You Dry Your Helmet?
Drying your helmet is important to ensure it remains clean, odor-free, and safe to use. Here are some steps to help you dry your helmet properly:
Most helmets have removable interior padding and liners. Take these out if your helmet has them. These can be hand-washed separately.
Ventilation: Dry your helmet in a well-ventilated area. Avoid direct sunlight or high-heat sources such as radiators, as excessive heat can damage the helmet’s materials.
Air Dry: The best way to dry a helmet is to let it air-dry naturally. You can place it in a cool, dry place with good airflow. This allows moisture to evaporate without damaging the helmet’s structure. Hanging it on a helmet hook or placing it on a clean, dry surface is recommended.
Use a Fan: If you need to expedite drying, use a small electric fan to increase air circulation around the helmet. This can accelerate moisture evaporation.
Avoid Heat Sources: Do not use hair dryers, heaters, or other heat sources to dry your helmet, as excessive heat can deform or damage the helmet’s materials, including the foam inside.
Cleaning: While drying, you can also take the opportunity to clean the helmet’s exterior. Use a mild soap-and-water solution to wipe it down and remove dirt or sweat.
Check Straps and Buckles: Ensure the straps and buckles are not damaged and allow them to air-dry. Do not force them to dry quickly, as it may compromise their integrity.
Reassemble: Once everything is thoroughly dry, reassemble your helmet by reinstalling the interior padding and liners.
Storage: Store your dry helmet in a cool, dry place away from direct sunlight, extreme temperatures, and any chemicals or solvents.
How Do I Look After My Bike Helmet?
Taking good care of your bike helmet is important to ensure it remains safe and effective.
Here are some tips on how to look after your bike helmet:
Regular Inspection: Before every ride, take a moment to inspect your helmet. Look for any cracks, dents, or visible damage. If you find any damage, it’s important to replace the helmet.
Clean It: Sweat and dirt can accumulate on the inside and outside of your helmet. Use a mild soap and water to clean the shell and padding. Avoid using abrasive or harsh chemicals, as they may damage the helmet. Remove any removable padding and clean it separately.
Avoid Heat: Never leave your helmet in a hot car, near a heater, or in direct sunlight for extended periods. Heat can cause the helmet’s materials to degrade.
Don’t Paint or Modify: Avoid painting or adding stickers to your helmet. Some paints and adhesives can weaken the helmet’s shell. If you want to enhance visibility or personalization, opt for reflective stickers or accessories designed for helmets.
Helmets are designed to absorb a single impact. If you’ve been in an accident, even if the helmet appears undamaged, it’s advisable to replace it. Additionally, helmet manufacturers often recommend replacing the helmet every 3-5 years, depending on use and exposure to the elements.
Adjust Properly: Ensure your helmet fits snugly but comfortably. Adjust the straps and retention system to ensure a secure fit. A properly fitted helmet is more effective in protecting you.
Keep It Dry: After wet rides, allow your helmet to dry naturally. Don’t use heat sources like hairdryers, as they can damage the helmet’s materials.
Transport Safely: When transporting your helmet, wear it, carry it in a helmet bag, or secure it to prevent it from rolling around or getting crushed in your bag.
(FAQs)
Why should I clean my bike helmet?
Regular cleaning removes sweat, dirt, and bacteria that accumulate on your helmet, ensuring it remains safe and comfortable to wear. It also helps extend its lifespan.
Can I wash my helmet in a washing machine?
No, it’s not recommended to put your helmet in a washing machine as it can damage the helmet’s structure and foam. Hand cleaning is the preferred method.
How can I clean the outer shell of my helmet?
To clean the outer shell, use a mild soap or helmet-specific cleaner and warm water. Avoid abrasive materials that can scratch the shell.
Can I submerge my helmet in water?
Submerging your helmet in water is not recommended, as it can damage the helmet’s internal components. Stick to surface cleaning.
How do I clean the straps and padding?
Remove the inner pads and straps if they’re removable. Hand-wash them in warm water with a mild detergent. Rinse and allow them to air dry completely before reattaching.
How do I clean the helmet’s ventilation holes?
Use a soft brush or a toothbrush to clean the vents. Ensure they are free of dirt and debris to ensure proper ventilation.
Can I use a disinfectant spray on my helmet?
Yes, a mild disinfectant spray can be used on the interior padding and straps to kill bacteria and eliminate odors. Ensure it’s compatible with helmet materials, and rinse or wipe off any excess.
What should I do if my helmet was significantly impacted or in a crash?
If your helmet was involved in a crash or received a significant impact, it’s crucial to replace it. Helmets are designed to absorb and dissipate energy in a single-use manner and may have hidden damage even if they appear intact.
How long does a bike helmet last?
The lifespan of a bike helmet varies, but it is generally recommended to replace it every 3-5 years. However, you should replace it sooner if it’s been in a crash or shows signs of wear and tear.
Final Thoughts
Keeping your bike helmet clean is crucial to its safety, hygiene, and longevity. Regular cleaning not only helps maintain its appearance but also ensures that it continues to provide the protection you need while cycling.