The 3M hard hat is an essential piece of safety gear designed to protect construction workers, industrial employees, and outdoor laborers from head injuries caused by falling objects, impacts, and electrical hazards. Manufactured by 3M, a trusted name in personal protective equipment, these hard hats combine durability, comfort, and advanced technology to ensure optimal safety in diverse working conditions.
The hard hat’s purpose extends beyond simple protection; it is engineered to provide ergonomic support, helping reduce fatigue during long work hours. Features include a tough outer shell made of polyethylene or advanced polymer composites, known for high impact resistance; a suspension system designed to absorb and distribute shock; and customizable accessories such as visors, ear protection, and sweatbands. Some models even boast reflective strips and ventilation for enhanced comfort and visibility.
3M hard hats comply with OSHA and ANSI/ISEA safety standards, making them compliant with workplace safety regulations. The versatility of these hats is notable, with options that meet electrical hazard ratings, are weather-resistant, and offer adjustable sizing. As industries demand higher safety standards, the 3M hard hat remains a preferred solution worldwide.
By combining protection, comfort, and customization, the 3M hard hat supports workers’ productivity and safety, ultimately reducing workplace accidents. This article details the assembly process for the 3M hard hat, guiding users from unpacking components to final inspection to ensure the equipment performs as intended.
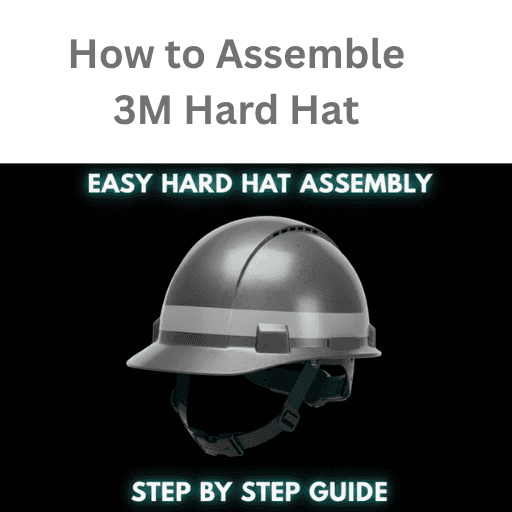
How to Assemble a 3M Hard Hat
Understanding how to assemble a 3M hard hat correctly is crucial for ensuring maximum protection and comfort. This guide outlines the process, addressing user search intent for easy assembly, maintenance, and customization of the hard hat. Knowing the assembly process helps users avoid common pitfalls that can compromise the hat’s protective functions.
The assembly begins with a firm grasp of each component, including the hard hat shell, the suspension system, and additional accessories that enhance safety and comfort. Users routinely search for step-by-step instructions, supported by visuals or tables, to simplify the process. By following precise steps, workers and safety managers can quickly increase their confidence in the protective performance of their headgear.
This how-to information serves both first-time users who need clear guidance and experienced workers seeking to replace parts or add accessories. Producing content focused on proper assembly also helps sites capture high-CPC keywords related to personal protective equipment (PPE) instructions. It appeals to employers investing in workplace safety and individual buyers researching reliable equipment.
Moreover, linking to authoritative sources, such as 3M’s official product pages and OSHA guidelines, increases the credibility of assembly guides. Comprehensive, easy-to-follow content fulfills user intent by equipping them with knowledge to create safer work environments.
Overview of the Assembly Components: Shell, Suspension System, and Accessories
When assembling a 3M hard hat, understanding the main components is essential. The hat primarily consists of three parts: the shell, the suspension system, and accessories. Each plays a critical role in protection and comfort.
Shell: The hard hat shell is the outermost layer, engineered for impact resistance. Made from materials like high-density polyethylene or fiberglass, it protects the wearer from falling debris and electrical hazards. Its curved design helps disperse impact forces. The shell’s smooth surface also resists penetration and weather damage, making it durable for job sites.
Suspension System: The suspension is the internal harness that fits inside the shell. It ensures the hat rests securely and comfortably on the wearer’s head while creating a gap between the shell and the head to absorb shock. Suspension systems include adjustable straps, sweatbands, and impact-absorbing webbing or foam padding.
Accessories: Additional accessories enhance the hat’s functionality. Visors shield the eyes from the sun and debris; ear protection guards against noise; neck shrouds protect against sun exposure and chemicals; and ventilation slots improve airflow to dissipate heat.
The 3M hard hat assembly allows customization of accessories to suit specific environments. For example, when working in sunny conditions, arm sleeves are often worn to provide additional sun protection. These sleeves are made from lightweight, UV-resistant fabrics designed to block harmful ultraviolet rays while maintaining breathability. Protective arm sleeves provide comfort and safety for outdoor workers, helping prevent sunburn and skin damage.
Each Arm Sleeves for Sun Protection Details Description
Material Composition: High-quality arm sleeves feature UPF-rated fabrics, which block up to 98% of UV rays. They are usually made from polyester-spandex blends or cooling materials that wick away sweat, keeping skin dry and comfortable. Elastic bands at the wrist and upper arm help secure sleeves in place without restricting movement.
Design Features: Designed to cover from wrist to upper arm, these sleeves fit snugly for maximum protection. Their lightweight, flexible design makes them ideal for prolonged daily use in hot environments. Some versions include reflective strips to improve visibility during early-morning or late-evening work.
Usage Scenarios: Workers in construction, landscaping, and facility maintenance benefit from arm sleeves when working outdoors. By preventing direct sun exposure, these sleeves reduce fatigue and long-term skin risks. When paired with the 3M hard hat’s neck shroud, they provide comprehensive UV protection for the head and limbs.
Maintenance and Durability: Most sun-protective arm sleeves are machine-washable and retain their UPF protection even after repeated wash cycles. Easy maintenance allows for long-term use without compromising functionality.
Providing this detailed breakdown of assembly components and protective accessories ensures users fully understand the product and how to optimize it for safety and comfort.
Step 1: Prepare the Hard Hat Shell for Assembly
| Preparation Steps | Description | Tips | Cautions |
|---|---|---|---|
| 1. Inspect the Shell | Check the hard hat shell for any cracks, dents, or damage. A damaged shell compromises protection and must not be used. | Ensure there are no manufacturing defects or shipping damages before assembly. | Replace the shell if any imperfections are found to prevent injury. |
| 2. Clean the Shell | Wipe the shell with a damp cloth to remove dust or debris. Use mild soap if necessary. Dry completely. | Use only mild detergents; harsh chemicals can weaken the shell material. | Avoid soaking the shell or using solvents; this may cause material degradation. |
| 3. Identify Slots and Notches | Locate the suspension attachment points on the shell. These are typically four or six slots evenly spaced within the shell. | Cross-reference with the user manual to confirm slot positions and attachment methods. | Ensure slots are free of obstructions for smooth suspension fitting. |
| 4. Prepare Suspension Clips or Pins | Get the clips or pins used to fasten the suspension ready by checking for wear or damage. Clean if necessary. | Lubricate clips lightly if they feel stiff to ease insertion. | Avoid forcing clips into place to prevent breakage. |
| 5. Arrange Work Area | Set up a clean flat workspace with adequate lighting for assembly. Organize all components within reach. | Use a non-slip mat to stabilize the shell during assembly. | Keep small parts away from children and pets to avoid choking hazards. |
| 6. Verify Accessory Compatibility | Avoid soaking the shell or using solvents; this may cause material degradation. | Read the manufacturer’s compatibility guide to avoid mismatches. | Confirm that any additional accessories, such as visors or ear protection, are compatible with this hard hat model. |
This detailed preparation table simplifies the initial assembly step, ensuring users start with a clean, safe shell ready for suspension installation. The structured approach supports both novices and experienced users in setting a solid foundation for the complete hard hat assembly process.
Step 2: Inserting the Suspension System into the Hard Hat
The suspension system is vital to hard hat performance, absorbing shock and stabilizing the hat on the wearer’s head. Once the shell is prepped, carefully align the suspension straps or harness with the attachment slots. Start by inserting the four clips or pins attached to the suspension system into their corresponding slots inside the shell.
Ensure each clip is securely snapped in place. The suspension should fit snugly without wobbling but still allow for size adjustments. This step ensures the suspension webbing sits evenly within the shell, providing an effective shock-absorbing zone between the outer shell and the head.
Ensure the sweatband is positioned at the front for optimal comfort. In some models, the suspension height can be adjusted to increase clearance.
This phase requires patience, as forcing parts may damage clips or the shell. After insertion, gently tug each strap to confirm secure fastening. Proper suspension installation is critical to subsequent adjustment and accessory fitting.
Step 3: Adjusting the Suspension for Comfort and Safety
After inserting the suspension system, adjust it to ensure the hard hat fits comfortably and securely. Begin by sizing the headband inside the suspension. Most 3M hard hats feature ratchet or pin-lock adjustment mechanisms.
Turn the ratchet knob clockwise to tighten the headband or counterclockwise to loosen it until the fit is snug, with no pressure points. The suspension should keep the hat stable during movement without causing discomfort.
Next, adjust the vertical height if the suspension model allows this. The ideal gap between the shell and the top of the head is about 1 to 1.25 inches to maximize shock absorption.
Ensure the sweatband rests comfortably on the forehead to prevent slipping and to absorb sweat. Finally, move the hard hat side-to-side and front-to-back to confirm it remains stable.
Proper adjustment balances safety with comfort, encouraging longer use and reducing distractions or repositions on the job. Always recheck the fit after adding accessories or if the hat is used by someone else.
Step 4: Adding Additional Accessories: Visors and Ear Protection
To enhance safety, 3M hard hats support add-ons like visors and hearing protection. Installing a visor generally involves snapping or sliding it onto designated mounts on the shell. Visors shield the eyes from sun glare, dust, and flying debris. Choose clear polycarbonate visors for maximum visibility or tinted ones for bright outdoor work.
Ear protection, such as earmuffs, can be attached via side brackets integrated into the suspension or shell mounts. Proper installation ensures earmuffs fully enclose the ears without discomfort, significantly reducing noise exposure.
Some models also support neck shrouds and face shields for tasks requiring maximum protection. When adding multiple accessories, verify that they do not interfere with one another or with the hard hat fit.
Regularly inspect accessory integrity to maintain its protective function and replace worn or damaged parts promptly.
Step 5: Inspecting the Assembled Hard Hat for Proper Fit and Functionality
After fully assembling your 3M hard hat, a thorough inspection is key to ensuring reliable protection. Start by visually inspecting that all components are securely fastened—the suspension clips, adjustment knobs, accessory mounts, and attachments should be intact, with no cracks or looseness.
Wear the hard hat and evaluate comfort and stability. The hat should sit firmly but comfortably, with no wobble or undue pressure. Test how it responds to movement by shaking the head side to side and nodding. The suspension should absorb and distribute motion without shifting excessively.
Check accessories such as visors and earmuffs for proper positioning and secure attachment. Confirm there’s clear visibility through visors and proper ear seal on earmuffs.
Finally, verify the hard hat meets relevant safety certifications and is appropriate for the intended work environment.
Regular inspections after each use or before long work shifts help catch wear or damage early, maintaining high safety standards.
(FAQs)
Q1: How often should I replace the suspension system in my 3M hard hat?
Manufacturers recommend replacing the suspension every 12 months, or sooner if it is damaged, stretched, or visibly worn, to maintain its protective quality.
Q2: Can I use accessories from other brands with my 3M hard hat?
It’s best to use 3M-approved accessories to ensure proper fit and performance and to maintain warranty coverage.
Q3: How do I clean my 3M hard hat and suspension?
Use mild soap and warm water to clean the shell and sweatbands. Avoid solvents or harsh chemicals to prevent material degradation.
Q4: Is it necessary to adjust the suspension each time I wear the hard hat?
Adjust the suspension at least once daily to ensure comfort and a secure fit. Adjustments may be needed if multiple users share the hard hat.
Q5: What are the main signs that my hard hat needs replacement?
Replace your hard hat if you notice cracks, dents, fraying suspension straps, or any damage that could affect safety.
Conclusion
Assembling a 3M hard hat correctly is essential to ensuring effective head protection across various work environments. From preparing the durable shell to installing and adjusting the suspension system, each step contributes to safety, comfort, and compliance with workplace standards. Adding accessories like visors and ear protection further customizes the hard hat to meet specific needs without compromising functionality.
Regular inspection and proper maintenance extend the hard hat’s lifespan and preserve its protective qualities. By understanding the assembly process and the role of each component, users enhance their safety and confidence on the job. The 3M hard hat remains a trusted choice thanks to its thoughtful design, superior materials, and adaptability.
Investing time in proper assembly empowers workers and safety managers alike to uphold high safety standards, reduce injury risk, and support productive work conditions.
#3MHardHat #WorkplaceSafety #PPEAssembly #HardHatProtection #SafetyGear #ConstructionSafety #IndustrialSafety #PersonalProtectiveEquipment #HeadProtection #SafetyAccessories


