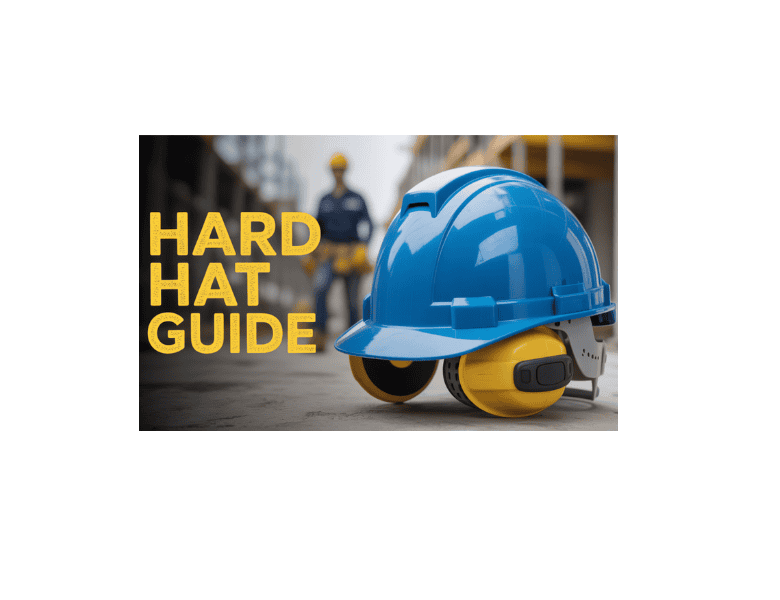
Construction hats are a cornerstone of personal protective equipment (PPE) in many industries, including construction, mining, manufacturing, and power. However, while many people recognize that wearing a hard hat is necessary, fewer are aware of how to set it up for adequate protection.
Failing to assemble a construction hat correctly can compromise its efficiency, placing the wearer at risk. This detailed overview will guide you through constructing a construction hat, provide vital tips for ensuring a proper fit, and explain why this small action can make a significant difference in office safety.
Why Correct Hard Hat Assembly Matters
Before studying the assembly procedure, it is essential to understand why properly assembling your hard hat is critical. According to the U.S. Bureau of Labor Statistics, head injuries account for nearly 8% of all office injuries requiring hospitalization. More strikingly, a research study reveals that up to 40% of workers who suffered a head injury were either not using their construction hats or were wearing them improperly at the time of the incident.
A hard hat can provide the intended protection if it is properly assembled and worn as intended. A poorly constructed hard hat could:
1. Diminish during an autumn or impact
2. Shift on your head, exposing yourself to injury
3. Cause pain brings about non-compliance
By following the steps below, you’ll ensure your construction hat provides full protection and remains comfortable, even during the longest shifts.
Components of a Hard Hat
To understand just how to assemble a hard hat, let’s begin by determining its primary elements:
1. The Covering
The external covering is the noticeable, stiff portion. It is typically made from high-density polyethylene (HDPE) or various other sturdy plastics. It protects against effect and penetration hazards.
2. Shock Absorber
This internal structure absorbs shock and creates a void between the head and the shell, significantly reducing the force transferred to the head during a strike.
3. Headband
Part of the shock absorber, the headband fits snugly around your head, ensuring a secure fit.
4. Chin Band
Some construction hats include a chin strap for added stability in settings where the hat is at risk of being displaced, such as in gusty conditions or while working at elevated heights.
Step-by-Step: How to Construct a Construction Hat
Let’s walk through the proper steps to assemble a hard hat. This procedure is generally similar across many brand names and styles, though always consult your specific producer’s guidelines for any variations.
Step 1: Examine the Parts
Before setting up, validate that you have all the needed components:
Hard Hat Shell
1. Suspension system (including headband and crown bands)
2. Optional chin strap or sweatband attachments
Examine that all parts are free from cracks, cuts, or contortions. Never use or construct a hard hat with damaged components; replace them promptly.
Action 2: Prepare the Suspension System
Unfold the shock absorber, gently extending the crown straps and headband. Many suspensions arrive partially collapsed for packaging, so you’ll need to “open” them into a spherical shape that resembles a head.
Step 3: Affix Suspension to Shell
The majority of hard hats use a 4-, 6-, or 8-point shock absorber, indicating the number of ports inside the shell.
Identify the Front and Back: Most construction hats have markings (such as ‘Front’ or an arrowhead) on the shell and/or the suspension. Align these for an ideal fit.
Place Suspension Tabs/Clips: Insert each suspension tab or clip into the corresponding port in the covering, one at a time. You should feel or hear a click as each tab locks into place.
Inspect Protection: Once all tabs are in place, gently pull the suspension to ensure it’s securely fastened.
Tip 4: Change the Headband
With the suspension installed, adjust the headband to fit your head. Most hard hats include a cog or pin-lock system at the back:
Ratchet Modification: Transform the knob to adjust the fit for tightening or loosening.
Pin-Lock Adjustment: Position the pins in the correct port according to your head size.
The headband ought to sit easily above your eyebrows and ears– neither too tight, nor too loose. The perfect fit keeps the hat in place without creating stress points.
Tip 5: Affix Chin Band (If Relevant)
If your worksite needs a chin strap, affix it according to the manufacturer’s guidelines. Ensure it is snug yet not constricting, allowing you to talk and move freely.
Step 6: Mount Optional Accessories
Some hard hats permit the installation of devices, such as sweatbands, earmuffs, or face shields. Affix these as required, adhering to the guidelines provided.
Construction Hat Assembly: Typical Mistakes to Avoid
Even with the very best intentions, it’s easy to make errors during setup. Below are some of the most common mistakes and just how to prevent them:
Wrong Suspension Orientation
Installing the suspension in reverse can compromise security or cause discomfort. Constantly match the ‘Front’ noted on the suspension with the front of the covering.
Incomplete Tab Engagement
Failing to secure all tabs can cause the suspension to detach during use. Double-check that each tab is totally involved.
Over- or Under-Tightening
A headband that’s too tight can cause migraines, while one that’s too loose can cause the construction hat to fall off. Readjust for a snug, comfy fit.
Overlooking Supplier Guidelines
Each hard hat version has specific assembly guidelines. Always seek advice from these to prevent compromising security.
How to Ensure a Proper Fit
Getting the assembly right is just half the fight. Ensuring your construction hat fits correctly is equally essential. Below’s how you can check for a great fit:
1. The hat should rest at a degree on your head, not slanted ahead or backward
2. There should be a 1 to 1.5-inch room between the top of your head and the covering
3. The suspension should not dig into your scalp or relocate easily when you move your head
4. If utilizing a chin band, it must rest easily under your chin
A well-fitted hard hat not only offers better protection but also enhances convenience, making it more likely you’ll keep it on throughout your shift.
How Often Should You Inspect and Replace Construction Hat Elements?
Even the best-assembled hard hat won’t last permanently. Regular examinations are essential to maintaining your head protection. According to OSHA and ANSI guidelines:
1. Check the covering and suspension before each usage for splits, damages, or used parts
2. Change the suspension system every year, even if no damage is visible
3. Change the shell every 2-5 years, depending upon the setting and supplier suggestions. Severe problems (extreme UV direct exposure, chemicals) can drastically reduce life expectancy
4. A 2020 study found that only 30% of employees changed their hard hats as frequently as recommended, highlighting a widespread location for improvement in PPE compliance.
Advanced Construction Hat Setting Up Tips
For those who wish to go the extra mile in construction for safety, security, and comfort, take into consideration these suggestions:
Add a Sweatband
Heats or literally requiring a job? Set up a moisture-wicking sweatband to minimize slippage and boost convenience.
Equip for the Task
If you’re in a noisy environment, search for construction hats with accessory slots for earmuffs. Suitable face shields can be affixed in locations where face defense is necessary.
Customized Fit
Some brand names offer flexible suspension heights, allowing you to adjust the hat as needed. Try out these setups until you find what works best for you.
The Impact of Correct Hard Hat Setting Up on Work Environment Safety And Security
The importance of an effectively put-together, well-fitting hard hat cannot be overstated. The National Security Council estimates that proper PPE use, including an appropriate construction hat assembly, could prevent countless head injuries each year. Head injuries are not only painful—they can be life-altering or perhaps deadly.
Research published in the Journal of Occupational and Environmental Health found that proper setup and fit reduced the risk of head injury by up to 60% compared with improperly used head protection.
Frequently Asked Questions Concerning Putting Together Hard Hats
Q: Can I blend and match various brands of shells and suspensions?
A: No. Mixing components from various suppliers or versions can compromise the integrity and accreditation of the hard hat. Always use suitable components as specified by the supplier.
Q: How do I tidy my hard hat after assembly?
A: Wipe the covering and suspension with mild soap and warm water. Avoid harsh chemicals or solvents, as they can deteriorate the plastic and minimize protection.
Q: What should I do if my construction hat really feels uncomfortable after assembly?
Try adjusting the headband or checking the suspension orientation to see if that resolves the issue. If discomfort persists, consider adding a sweatband or switching to a shock absorber with increased padding or a different style.
Verdict: Safeguard the Majority Of Belongings Possession – Your Head
Properly constructing a hard hat is straightforward yet essential for your safety and security at work. By following these comprehensive steps to assemble a construction hat, you ensure compliance with workplace safety standards while also optimizing your comfort and protection. Keep in mind that a well-assembled hard hat can mean the difference between ignoring a mishap and experiencing a significant injury.
Suppose you found this overview helpful and intend to dive deeper into PPE’s finest methods [discover our in-depth guide to hard hat maintenance and examination]. Your safety is an investment—keep learning, remain informed, and never compromise on protection.
Remain secure and make the on-site environment a safer place every day.
HardHatHustle #SafetyFirst #DIYHardHat #GearUp #ConstructionLife #HardHatAssembly #StaySafeOutThere #BuildItRight #HardHatReady #WorkSmartPlayHard #SafetyStyle #AssemblyLineFun #HelmetOn #HardHatVibes #WorkHardPlaySafe #ConstructionGoals #SafetySquad #HardHatTips #GetItDone #OnTheJob #ToolTime #CraftyConstruction #HardHatHacks #JobSiteJive #SafetySavvy #AssembleLikeAPro #InstaConstruction #HardHatLove #WorkplaceWarrior #LetsGetBuilding
How to assemble a hard hat, how to assemble hard hat, hard hat assembly, how to assemble hardhat, how to assemble 3m hardhat, how to assemble 3m hard hat, 3m hard hat assembly, how to assemble 3m, how to assemble a bullard hard hat, how to assemble build install hard hat, how to assemble, hard hat assembly instructions, assemble a hard hat, hardhat assembly, hard hat assembly 3m, 3m hardhat assembly, how to set up a hard hat, msa hard hat assembly


