Replacing a door lock is an essential Home maintenance task that enhances security and ensures reliable door function. Whether you’ve moved into a new Home, lost keys, or want to upgrade to a higher-quality lock, knowing how to replace a door lock confidently can save time and money. The process, while straightforward, requires attention to detail and proper tools.
Lock replacement involves removing the old lock hardware, prepping the door for new components, installing the new lockset, and testing it to verify smooth operation. Each step must be done carefully to avoid damage to the door or misalignment, which can impair performance.
This guide explains the entire door lock replacement procedure, ideal for homeowners and DIY enthusiasts seeking a complete understanding. It covers required materials, safety tips, detailed installation steps, troubleshooting common issues, and finishing touches for a professional result.
Informed lock replacement enhances Home security by providing control over property access and also improves aesthetic appeal with modern lock designs. For deeper insights and visual tutorials, consider visiting Home Depot, Lowe’s, and This Old House.
How to Replace Door Lock
Replacing a door lock begins by choosing the appropriate new lock compatible with the door’s thickness and backset. Removal of the old lock involves unscrewing the knobs or lever handles, detaching the latch, and removing the strike plate on the door frame.
Once the old hardware is completely removed, the door must be cleaned and inspected for damage that might impact the new lock installation. At this stage, ensuring the door bore holes and latch recess fit the new hardware is critical.
Next, prepare the new lock by verifying that all components are intact and assembling any parts as per the manufacturer’s instructions. Insert the new latch mechanism into the door edge and align the exterior and interior knobs or cylinders.
Secure the lock by tightening the screws evenly without forcing components. Attach the strike plate on the door frame with care to ensure proper alignment with the latch bolt.
Complete the process by thoroughly testing the lock’s operation across locking and unlocking cycles to verify smooth function and secure closure.
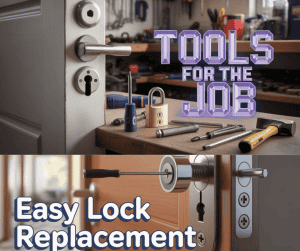
Tools and Materials Needed for the Job
Screwdrivers: Essential tools include Phillips and flathead screwdrivers to remove and install screws securing lock components and strike plates. A magnetic screwdriver helps prevent screw loss.
Measuring Tape: Accurate measurements of door thickness, backset (distance from door edge to keyhole centre), and hole diameter aid in purchasing compatible locks and ensuring perfect fitment.
Additional helpful materials are:
Drill and Drill Bits: For securing components with pilot holes and for any necessary door adjustments.
Chisel and Hammer: To refine the mortise area for latch or strike plate installation.
Utility Knife: For cleaning paint or debris around door bores that might hinder fitting.
Lubricant: Graphite powder or silicone spray for smooth operation of locking mechanisms after installation.
Replacement Screws: Sometimes new screws better fit or longer screws improve strike plate security.
Cleaning Supplies: Cloth and brush to tidy lock installation areas.
Organizing these tools in advance enhances efficiency and reduces installation errors.
Safety Precautions Before Starting the Replacement
| Precaution No. | Safety Measure | Reason | Practical Tips |
|---|---|---|---|
| 1 | Wear gloves | Protect hands from sharp screws and edges | Use cut-resistant gloves |
| 2 | Ensure adequate lighting | Prevent mistakes and accidents | Use portable LED lamps if working in dim areas |
| 3 | Clear workspace | Avoid tripping or damaging components | Remove clutter and keep parts organized |
| 4 | Use insulated tools if near electricity | Avoid electrical shock | Confirm power is off near the electronic locks |
| 5 | Handle power tools carefully | Prevent injury and damage | Follow the manufacturer’s safety instructions |
| 6 | Secure the door in a fixed position | Avoid accidental swinging or pinching | Use clamps or assistants if needed |
| 7 | Follow proper ergonomic techniques | Reduce strain and potential injury | Maintain a stable posture and avoid overreaching |
| 8 | Avoid forcing components | Prevent door or hardware damage | Use correct tool sizes and double-check measurements |
| 9 | Keep children and pets away | Avoid distraction and accidents | Close off the work area |
| 10 | Review installation manuals thoroughly | Ensure correct sequences and procedures | Read and keep manuals accessible during installation |
Comprehensive safety adherence results in a smooth, injury-free, and damage-free door lock replacement.
Removing the Old Door Lock: Step-by-Step Instructions
Begin by using the appropriate screwdriver to remove the screws holding the interior knob or lever. If these are hidden beneath decorative plates, carefully pry the plates off.
Once the screws are removed, pull off the interior and exterior knobs or handles. Next, unscrew and remove the latch plate on the edge of the door.
Slide out the latch mechanism carefully. If your door has a deadbolt, remove the cylinder by loosening the retaining screws through the door.
Lastly, remove the strike plate from the door frame by unscrewing it.
Clean around the door bore holes to remove dust, old paint, or debris. Inspect the door edge and frame for damage or irregularities that might interfere with the new lock fit.
Preparing the New Door Lock for Installation
Unpack the new lock and verify the components: exterior and interior handles or knobs, latch mechanism, screws, and strike plate. Refer to the included installation manual for any manufacturer-specific assembly requirements.
If the latch includes an adjustable backset (usually 2 3/8 or 2 3/4 inches), set it according to your door’s measurement.
Ensure the latch bolt’s bevelled edge faces the door jamb for smooth closing and latching.
Check that the spindle length—connecting interior and exterior handles—matches your door thickness. Trim if necessary.
If your lock includes a deadbolt, prepare the cylinder and thumb turn mechanisms similarly.
Organize components neatly to streamline the installation.
Installing the New Door Lock: Detailed Guide
Insert the latch into the door edge borehole, ensuring correct orientation with the bevelled side facing the strike plate.
Feed the spindle or connecting rod through the latch mechanism. Position the exterior lock assembly first, inserting it from the outside of the door.
Align the interior lock components on the opposite side. Make sure the knobs or handles fit securely over the spindle.
Start screwing in fasteners loosely, then incrementally tighten them in alternating fashion to apply balanced pressure.
Attach the strike plate onto the door frame, verifying alignment with the latch bolt hole. Pre-drill pilot holes if needed, especially in hardwood door jambs, to prevent splitting.
Use sufficiently long screws (3 inches or more) to secure strike plates firmly in the structural frame rather than just the trim for better security.
Testing the New Door Lock for Proper Functionality
Test the lock by turning the key or thumb turn multiple times to ensure smooth locking and unlocking.
Check that the latch bolt fully extends and retracts without sticking or excess noise.
Close and open the door several times to verify the latch engages easily with the strike plate.
Operate the handle or knob in both locked and unlocked positions to confirm proper disengagement.
If you notice stiffness, try loosening screws slightly, realigning the strike plate, or applying lock lubricant to smooth mechanisms.
Re-test after making adjustments to ensure reliability.
Common Issues During Lock Replacement and How to Troubleshoot
Latch hitting the door frame: The strike plate may be misaligned or too shallow. Solution: Adjust the strike plate position or deepen the mortise with a chisel.
Key hard to turn: Possible causes include incorrect key, improper installation depth, or internal misalignment. Solution: Check the key, re-align the lock, or lubricate.
Loose locks or handles often result from stripped screws or improper tightening. Use proper screws and tighten evenly without over-tightening.
Door not closing fully: This issue could result from a swollen door, hinge misalignment, or protruding hardware. Inspect hinges and adjust as needed.
Misfit of new lock components: Re-measure door thickness and backset. Return incompatible locks for correct sizing.
Finishing Touches: Securing the Lock and Door
Once all components are installed and functioning, perform a final tightening of all screws to ensure no parts loosen over time.
Clean the door and lock surfaces to remove fingerprints, dust, or installation debris.
Apply lubricant sparingly to keyholes and latch bolts to promote smooth operation and reduce corrosion.
Ensure door frames and strike plates are free from paint or debris to prevent locking issues.
Check the aesthetic finish of locksets and knobs, making minor adjustments if necessary for seamless integration.
(FAQs)
Q1: Can I replace a door lock myself without professional help?
Ans: Yes, with basic tools and instructions, DIY lock replacement is feasible for standard locks.
Q2: How do I know which lock fits my door?
Ans: Measure your door thickness, backset, and hole diameters before buying a new lock.
Q3: Should I replace the strike plate when changing locks?
Ans: It’s recommended to replace it if damaged or incompatible with the new latch for better security.
Q4: How often should I change locks for security reasons?
Ans: Consider replacement after moving into a new property, losing keys, or if locks show signs of wear or damage.
Conclusion
Replacing a door lock is a vital task that promotes Home security and personal safety. Through this comprehensive guide, homeowners and DIYers can approach the lock replacement with confidence, equipped with knowledge about proper tools, safety measures, and step-by-step instructions.
Following best practices in removing old hardware, prepping the door, aligning new locks, and thorough testing ensures the installation will be durable and reliable. Troubleshooting common issues avoids potential frustration, saving time and money.
Maintenance and finishing care sustain lock performance and appearance, extending the lifespan of security devices.
Empowered with this information, you can confidently update your door locks, fortifying your Home without professional expense while enhancing your understanding of household security systems.
#ReplaceDoorLock #HomeSecurity #DIYLockChange #LockInstallation #DeadboltReplacement #LockMaintenance #SecureHome #LockTroubleshoot #DoorHardware #LockTools# Introduction to the Door Lock Replacement Process