The Safety First infant car seat is a trusted child safety product designed to ensure newborns and infants travel securely in vehicles. Combining ergonomic design with high safety standards, it is tailored to provide comfort and optimal protection during every ride. This car seat is rear-facing only, emphasizing the most secure position recommended for infants and young toddlers. Parents and caregivers benefit from an intuitive installation process and adjustable features that meet various vehicle specifications and infant sizes.
Its user-focused design incorporates essential safety components like a sturdy harness system, cushioned shell, and side-impact protection. Beyond comfort and protection, the Safety First infant car seat conforms rigorously to federal safety regulations, delivering peace of mind to families. Understanding the proper installation and adjustment of this car seat is crucial to maximize safety benefits. This article comprehensively covers the installation steps, product features, and best practices, helping users guarantee their child’s safety on the road.
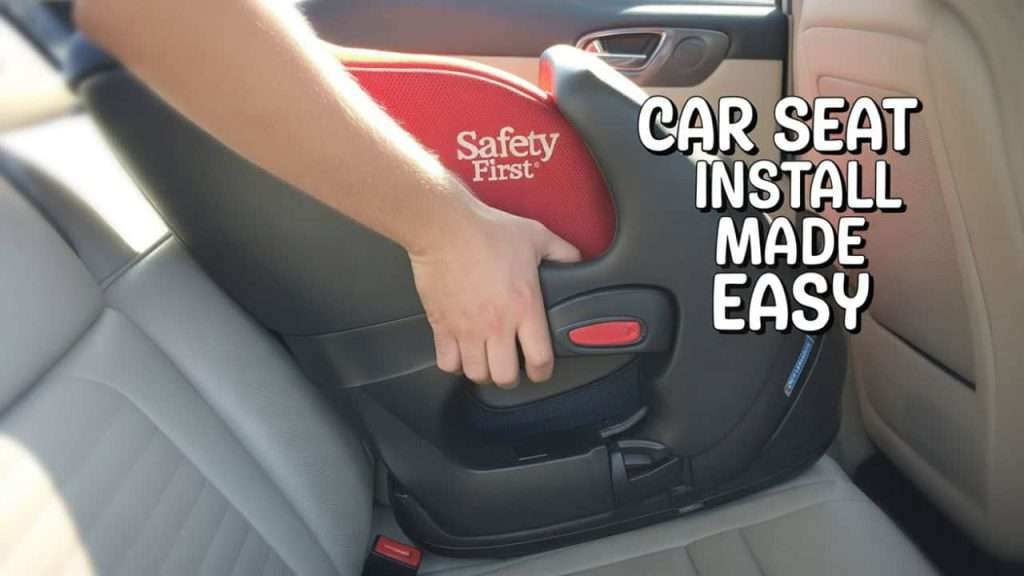
How to Install a Safety First Infant Car Seat
Installing the Safety First infant car seat correctly is vital for your child’s safety. The installation process involves securing the car seat either with the vehicle’s seat belt or the built-in LATCH system (Lower Anchors and Tethers for Children). Parents should start by reading both the car seat manual and their vehicle owner’s manual to understand the specific instructions and compatibility details.
First, place the infant car seat base on the vehicle’s back seat. The rear-facing orientation is mandatory; the car seat must face the back of the vehicle. Confirm the car seat’s angle by using the built-in level indicator. This ensures the seat is reclined properly to protect the infant’s head and airway. If the level indicator shows the wrong angle, adjust the base recline mechanism until the indicator is within the acceptable range for your child’s weight.
For seat belt installation, thread the seat belt through the belt path on the base, making sure the belt is not twisted. Pull the seat belt all the way out to activate the locking mechanism and then let it retract slowly. This locks the belt, preventing slack movement. Tighten the belt firmly by pressing down on the base and pulling the seat belt to remove slack. The base should move no more than one inch side to side or front to back. For LATCH installation, connect the lower anchor connectors to the vehicle’s lower anchors, then tighten using the straps on the base to remove all slack.
After securing the base firmly, place the infant carrier onto the base until it clicks into place. Adjust the handle and ensure the carrier locks completely. The harness must then be adjusted to fit snugly around the infant, with the chest clip positioned at armpit level.
Correct installation reduces the risk of injury during a crash. Users can often find instructional videos and manufacturer support for additional help. For more detailed installation guidance, you may visit the Safety First official website or trusted car seat safety resources.
For further in-depth instructions and professional tips about car seat installation and child safety, consult authoritative sources such as government safety agencies or certified child passenger safety technicians.
Review of Car Seat Components and Features
Base and Recline Mechanism
The car seat base is designed to anchor the infant seat securely to the vehicle. It features an adjustable recline mechanism that allows users to set the proper angle for infant safety and comfort. The built-in level indicator helps guide proper positioning based on the child’s weight range.
Harness System
The five-point harness system includes two shoulder straps, two waist straps, and a crotch strap. It is equipped with a chest clip that must be positioned at armpit level to distribute crash forces evenly and prevent ejection.
Side Impact Protection
The seat’s molded shell is padded with energy-absorbing materials to protect an infant’s delicate head and torso during side collisions, exceeding many safety requirements.
Handle and Portability Features
The handle has multiple positions, including an upright locked position when the seat is installed in a vehicle. The car seat is lightweight yet robust, facilitating easy transport without compromising safety.
Material and Comfort
The seat uses breathable, hypoallergenic fabric that is machine washable. Extra padding supports newborns and provides comfort even during longer journeys.
Compatibility and Safety Certifications
Safety First infant car seats meet or exceed U.S. federal safety standards and are compatible with a wide variety of vehicle models.
This combination of features ensures the Safety First infant car seat is among the leading choices for caregiver convenience and infant safety.
Preparing the Vehicle for Installation
| Step Number | Task Description | Detailed Instructions | Important Notes |
|---|---|---|---|
| 1 | Choose the Correct Seating Position | Select a back seat location recommended for child car seats, usually the middle of the rear seat or a side seat | Verify your vehicle owner’s manual for recommended seating locations |
| 2 | Clean the Seat Surface | Remove any debris, dirt, or objects from the seating area where the car seat base will be installed | Ensure the seat surface is flat to avoid an unstable installation |
| 3 | Locate LATCH Anchors and Seat Belt Buckles | Consult the car seat manual and vehicle manual for the anchors’ exact location | Consult the car seat manual and vehicle manual for anchors’ exact location |
| 4 | Check Car Seat Belt Condition | Inspect seat belt for twisting, fraying, or damage | Damaged seat belts should not be used for installation |
| 5 | Prepare Seat Belt Locking Feature | Inspect the seat belt for twisting, fraying, or damage | Locking prevents the belt from loosening once tightened |
| 6 | Adjust Rear Seat Recline (if available) | Pull the seat belt fully out to activate the switchable locking retractor in some vehicles | Some vehicles have fixed seatbacks that cannot be reclined |
| 7 | Position the Car Seat Base | Place the base flat on the vehicle seat and ensure stability | The base should not tip forward or sideways |
| 8 | Prepare Tools and Accessories | Ensure you have the instruction manual, seat belt locking clip (if applicable), and any manufacturer hardware | Prepare additional padding or rolled towels only if recommended |
| 9 | Check for Airbag Warnings | Ensure the car seat is NOT installed in the front seat where an active airbag exists | Recline the seatback of the vehicle’s rear seat if possible to assist with the proper infant seat angle |
| 10 | Perform Final Preparations | Wear comfortable clothing and ensure good lighting to perform a clear and precise installation | Take your time; rushing increases errors |
This detailed vehicle preparation facilitates a safe, secure, and compliant installation process. It is critical to double-check each of these steps during installation to minimize any risk of misuse that could lead to infant injury during travel.
Choosing the Correct Installation Method: LATCH vs. Seatbelt
When installing a Safety First infant car seat, parents must choose between the LATCH system and the vehicle’s seat belt. Both methods provide secure installation but have distinct considerations.
The LATCH system uses built-in anchors in the vehicle’s seat designed for child safety seats. It allows for easier installation as it generally requires less adjustment than seat belts. However, LATCH is limited by weight; typically, it is recommended for children under 40 pounds combined weight of the child and car seat. Exceeding this weight may compromise the integrity of LATCH anchors.
Conversely, the vehicle seat belt installation fits all child seat sizes and is often necessary if the vehicle lacks LATCH anchors. The seat belt installation requires threading the belt through specific belt paths on the base and locking the seat belt to prevent slack. While slightly more complex, this method is equally safe when performed correctly.
Factors influencing method choice include vehicle design, car seat model compatibility, child’s weight, convenience, and local regulations. Some caregivers prefer LATCH for ease, while others choose seat belt installation for maximum versatility. It is important to consult both the car seat and vehicle manuals to determine the safest option for your situation.
In all cases, ensuring the car seat is tightly secured and the installation angle is correct is more critical than the choice of method.
Demonstration of LATCH Installation
Installing the Safety First infant car seat using LATCH involves several precise steps to guarantee security. Begin by locating the lower anchors in your vehicle’s back seat, usually between the seat cushions. Attach the car seat base’s LATCH connectors to these anchors, ensuring they are firmly snapped in.
Next, tighten the LATCH straps by pulling on the adjustment strap while pressing down the base with your body weight. This helps eliminate slack that might allow movement. The base should not shift more than one inch when pushed or pulled at the belt path. If there is excessive movement, release the straps and re-tighten.
Once the base is secure, confirm that the seat recline indicator shows the correct angle according to your child’s weight. Adjust the recline foot on the base accordingly to achieve this level.
Place the infant carrier on the base, listening for a click indicating it is securely latched. Always verify that the carrier is locked in place by giving it a gentle tug.
Finally, adjust the harness straps and chest clip on the infant carrier for proper fit around your child, tightening as needed and securing the clip at armpit level.
The LATCH installation method is praised for its ease and security when executed correctly, adhering to all manufacturer guidelines13.
Demonstration of Seatbelt Installation
To install the Safety First infant car seat base with the vehicle seat belt, start by placing the base in the chosen rear seat area. Thread the seat belt through the designated belt path on the base, ensuring the belt lies flat without twists.
Pull the seat belt fully to the locking position. Many vehicles feature an automatic locking retractor that engages when the belt is fully extended and allows it to retract slowly. Alternatively, use the locking clip if your vehicle does not automatically lock.
Pull all slack from the seat belt while pressing down on the base with firm pressure—using your body weight or foot—to compress the vehicle seat cushion. This tightening step is critical to prevent base movement during a crash.
The base should not move more than an inch side to side or front to back at the belt path. If it does, try repositioning the base, retightening, or alternatively, use the LATCH system if available.
Once tight and stable, place the infant carrier onto the base until it audibly clicks, locking it in place. Verify the carrier is secure by lifting it slightly.
Ensure the infant car seat’s recline indicator shows the proper angle, adjusting the recline foot if necessary.
Finally, adjust the harness system to fit snugly around the child, verifying chest clip placement and strap tightness.
Proper seat belt installation can be as secure and safe as LATCH when all procedures are properly followed and the seat belt locking mechanism functions correctly13.
Adjusting the Car Seat for Proper Recline Angle
Maintaining the correct recline angle of the Safety First infant car seat is essential for infant safety and comfort. The recline angle prevents the baby’s head from falling forward, which can obstruct breathing, and also ensures adequate support.
Most Safety First car seats include a recline indicator or level bubble on the base or shell. For infants weighing 4 to 11 pounds, the indicator should read within the “newborn” or yellow zone. For babies between 11 and 35 pounds, the angle must adjust accordingly, typically within a white zone on the indicator.
Adjust the recline by using the base’s recline foot or pushing the seat back against the vehicle seat back while aligning the indicator. Some models allow multiple recline settings to accommodate different child sizes and vehicle seat contours.
After every adjustment, check the car seat’s stability at the belt path or LATCH anchors to confirm the base does not move more than one inch.
Regularly monitoring and adjusting the recline angle, especially after moving the car seat, enhances safety and reduces the risk of injury13.
Securing the Harness Straps and Chest Clip Correctly
The harness and chest clip are critical safety features designed to restrain the infant securely within the Safety First car seat. To secure them properly, first loosen the harness and place the infant in the seat.
Pull the harness straps over the child’s shoulders. The harness slots must be positioned at or just below the child’s shoulders for rear-facing use. Buckle the crotch strap and chest clip.
Tighten the harness straps by pulling on the adjustment strap at the front of the seat until the harness is snug and there is no slack. To test tightness, try to pinch the harness webbing at the child’s shoulders; you should not be able to pinch any excess material.
The chest clip should be aligned at armpit level, centered on the child’s chest. This positioning prevents the harness straps from slipping off the shoulders during sudden stops or crashes.
Incorrectly positioned chest clips or loose harness straps reduce the car seat’s effectiveness in protecting the child. Always refer to the manual for specific adjustment instructions and perform final checks before each ride.
Final Checks to Ensure a Secure Installation
Once the Safety First infant car seat is installed and adjusted, perform several final checks to confirm safety:
1. Test for base movement by pushing and pulling at the belt path; it should move less than one inch in any direction.
2. Verify the recline indicator shows the correct angle for your child’s weight.
3. Confirm the infant carrier clicks securely into the base and the carry handle is locked in the upright position.
4. Check harness straps for snugness with no slack and ensure the chest clip is at armpit level.
5. Ensure seat belt or LATCH anchors remain locked and tight with no visible twists or damage.
6. Review the vehicle and seat manuals to verify installation conforms with all specifications.
Taking these steps consistently ensures that the car seat will provide maximum protection in a crash. If there is any doubt or difficulty, consult a certified child passenger safety technician or use authorized service stations to inspect your installation.
(FAQs)
Q1: How do I know if the Safety First infant car seat is installed correctly?
A1: The car seat base should not move more than one inch side to side or front to back when tested at the belt path. The recline indicator must be within the proper weight zone (yellow or white), and the infant carrier should click securely into the base. Harness straps must fit snugly, with the chest clip at armpit level.
Q2: Can I use the Safety First infant car seat in any vehicle?
A2: It is compatible with most vehicles, but always check your vehicle owner’s manual to locate LATCH anchors or seat belt routing paths. Some older vehicles or sports cars may have limited compatibility.
Q3: When should I switch from the Safety First infant car seat to a convertible car seat?
A3: Transition when your child exceeds the weight or height limit specified by the Safety First car seat’s manual, usually around 35 pounds or when the child outgrows infant-specific measurements.
Q4: Is LATCH installation safer than seat belt installation?
A4: Both are safe when done correctly. LATCH is often easier for installation, but is limited by weight restrictions. Seat belt installation is more universal and equally effective if done properly.
Q5: How do I clean my Safety First infant car seat?
A5: Remove the fabric cover and wash according to the manufacturer’s instructions, usually machine washable in cold water. Clean the shell and harness straps with mild soap and water only; do not machine wash the straps.
Conclusion
Installing a Safety First infant car seat correctly is fundamental to ensuring your baby travels safely. By meticulously preparing your vehicle, understanding the components and features, and choosing the right installation method—whether LATCH or seat belt—you can achieve a secure setup that protects your child during transit. Adjusting the recline angle, harness straps, and chest clip further enhances the seat’s protective capabilities.
This comprehensive guide provides step-by-step instructions and practical tips tailored to the Safety First infant car seat, incorporating best practices aligned with national safety standards. Remember, frequent checks and adherence to the manufacturer’s guidelines help maintain the highest safety levels. For additional support, consulting certified child passenger safety professionals or official resources is advisable. Your diligent effort in safety contributes to peace of mind and the well-being of your infant on every journey.
#InfantCarSeat #ChildSafety #SafetyFirstCarSeat #CarSeatInstallation #BabyTravelSafety #LATCHInstallation #SeatbeltInstallation #CarSeatSafetyTips #ParentingSafety #ChildPassengerSafety


