A gliding deck entrance slides along a track (overhead, floor-mounted, or railing-guided) to open up alongside your railing, suitable for decks with stairways or edges.
It’s perfect as an infant entrance since it needs no swing clearance (terrific for limited decks), decreases tipping threats, and enables quick adult access without obstructing the playroom.
This guide covers planning, materials, structure, setup, security checks, and maintenance for a durable, code-compliant outcome.
Safety, Security, and Planning Considerations for a Baby-Friendly Gate
Begin by checking your deck: Note staircase locations, railing voids bigger than 4 inches, and article stability.
Action the opening specifically—size at top/bottom (make up out-of-square messages) and height from deck floor to a minimum of 34-36 inches for babies/toddlers (per ASTM F1004 requirements).
Key baby-safety specifications:
Height: A minimum of 34 inches; preferably 36+ to hinder climbing
Slat spacing: No more than 4 inches apart (utilize a 4-inch block to examine; stops head/limb entrapment)
No straight rails listed below 4 inches from the floor (to avoid grips)
Smooth surface areas, no sharp edges.
Examine local building ordinance (e.g., IRC requires guards 36 inches high on decks over 30 inches off the ground). Consult your city examiner if unclear —safety and security take precedence over appearances.
Picking the Right Sliding Gate Design
Sliding mechanisms:
Overhead track: Best for decks; wheels roll on a top rail
Pros: No flooring stumbling risk
Cons: Demands a tough header
Floor track: Cheaper; however, it is dangerous for babies (debris/toes). Avoid unless raised.
Railing-mounted sliders: Easy retrofit
Pros: Easy mount
Disadvantages: Much less smooth on unequal decks
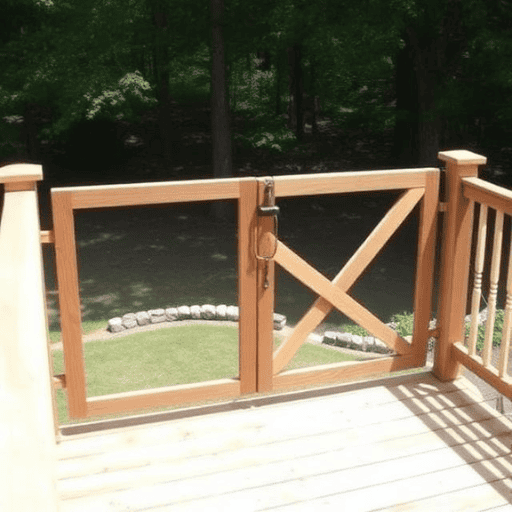
Gateway style/materials: Pressure-treated wood or cedar (suitable for decks; weather-resistant). Stay clear of metal (hot in sunlight, pinch dangers) unless powder-coated. Match barrier style for appearances.
Locks/latches: Child-resistant magnetic or keyless push-button kinds (e.g., KidCo versions). Mount at 38+ inches high, operable from both sides by grown-ups only.
Tools and Materials You’ll Need
Determining tape, 4-foot degree, circular/miter saw, drill/driver with bits, sander, clamps, security glasses/gloves.
Materials (for ~ 36-inch broad x 36-inch high gate):
Lumber: 2x4s for structure (4 pieces), 1×4 cedar slats (8– 10).
Hardware: Overhead track kit (e.g., 48-inch steel track with 4 wheels/rollers, $30– 50), galvanized/stainless screws (2– 3 inch).
Latch: Childproof moving bolt or magnetic lock.
Finish: Non-toxic exterior stain/sealant.
Optional: Soft-close dampers, wheel guards, and post brackets.
Measuring and Creating the Gliding Entrance
Measure opening width + 2 inches for overlap (e.g., 36-inch opening = 38-inch gate). Elevation: 36 inches from the deck floor. Confirm a square by measuring diagonals (equivalent = square).
Design a rectangle-shaped frame: 2×4 top/bottom rails, 2×4 side stiles, and one facility vertical support. Slats every 3.5 inches (measure voids precisely).
Strategy slide path: Guarantee 40+ inches clear, along with a full employment opportunity. Prevent floor obstructions.
Building Eviction Panel
Cut structure: Two 38-inch top/bottom rails, 2 34-inch stiles, one 34-inch facility brace (all 2×4).
Put together: Clamp square (use the 3-4-5 triangular approach: 36-48-60 inches on the edges), protected with 3-inch screws and exterior adhesive. Add slats flush to one side, spaced 3.5 inches (use spacers).
Sand whatever smooth (220-grit). Apply 2 coats of child-safe sealant (low-VOC, such as water-based polyurethane).
Mounting the Sliding Hardware
Reinforce articles: Include 2×4 dental braces or lag screws if the articles are unsteady
Mount track: Position expenses track 36 inches above deck, extending opening + 40 inches slide path. Degree flawlessly, safe and secure with 3-inch lag screws into posts/studs.
Connect rollers: Drill into the gate’s top edge, then place 2-4 sturdy wheels (rated for 75+ pounds), balanced front-to-back.
Test slide: Roll gateway by hand– change if binding.
Mounting and Adjusting Eviction
Lift the gate onto the track (use an assistant), then straighten the wheels in the grooves. Add anti-lift clips or washers to avoid upward pops.
Adjust: Shim for 1/8-inch spaces top/bottom/sides. Install rubber stoppers at the open/closed ends.
Examine threats: Cover track sides with U-channel guards; ensure no finger-pinch spaces under the gateway.
Adding a Child-Safe Latch and Extra Security Characteristics
Mount the latch at 40 inches high: Drill for a magnetic or hook-style attachment (e.g., safe and secure with 1.5-inch screws). Test grown-up ease/kid trouble.
Bonus:
1. Bottom move or tilted support to avoid lift/push-under
2. Soft-close joint for controlled movement
3. Brilliant tape on edges for presence
Weatherproofing and Upkeep
Seal all wood post-build (reapply yearly). Use stainless equipment to fight corrosion.
Regular monthly checks: Tighten up screws, clear track particles, test wheels/slats. Change if corrosion, totter, or spaces expand > 4 inches.
Examining Evictions for Baby Safety and Security
Move 50x: Smooth, no binding? Lock protects from both sides?
Safety and security: Probe voids using 4-inch or 9-inch blocks (fail = fix). Shake for stability; no climb places.
Obtain a second grown-up to test —readjust based on feedback.
Common Mistakes to Prevent
1. Gateway also short/wide spaces (procedure two times!)
2. Non-outdoor bolts (rust quickly)
3. Weak blog posts (reinforce initially)
4. Flooring tracks (trip risk)
5. Reduced locks (youngsters reach 36 inches conveniently)
Final Thought
Follow the preparation, construction, mounting, and examination steps for a secure, long-lasting baby gate.
Focus on security-slow down if rushed.
Next: Construct matching gates or upgrade locks as your child grows.